Storing massive data, as cheap as possible
The year is 1995 and you live in post-Soviet Russia.
It’s a hellish time: prices for basic consumer goods are triple what they were last year. Your employer just paid your salary in eggs instead of money. There are daily shootouts between rival gangs. 🎵Your love life’s DOA…🎵
It’s a wonderful time: Russia is awash in Western computers, TVs, VCRs, cassette players and dialup modems. Technology that was strictly off-limits in 1989 is suddenly within reach.
As one of the lucky Russians to have a computer at home, you are facing a challenge: your 500MB hard drive is overflowing with software, games, and documents. You must find an affordable way to get more digital storage.
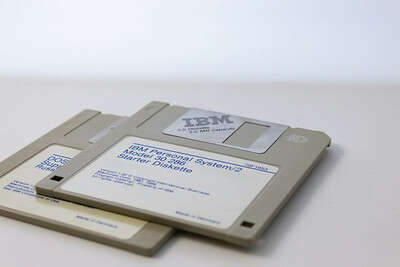
You could store files on cheap and plentiful floppy disks. But each floppy only stores 1.44MB and is known to randomly lose data. Your second option is to buy another hard drive. But that costs about $200 USD – as much as a Russian’s entire monthly salary…
You head over to the local computer store in a gray mood. The store is cramped with bootlegged computer games, peripherals and hardware. Inside, you ask Yevgeni the proprietor whether there might be a cheap solution to your storage problem.
This is Yevgeni:
Fortunately, Yevgeni does have a 3rd option for you! It’s a truly innovative Russian-made product called the “ArVid” card. It comes in a package like this:
It is an ISA expansion card for your computer and will allow you to use your home-VCR to store 4 hard-drives’ worth of data on a single VHS tape. The same tape you use to watch movies at home.
You hand over 80 American Dollars. Yevgeni slides out a little warranty card from inside the ArVid package, writes in the date of purchase and signs it. You step out of that store into the crisp air of a 1995 Moscow day. A proud owner of an ArVid 1030.
Getting started with this device
You take the package home and take a closer look at what’s inside:
There’s the ArVid ISA Card itself. This card slots into your “386” PC motherboard. The plate sits flush with the back of your computer. It has a port for a cable and a glossy diode for receiving an infrared signal.
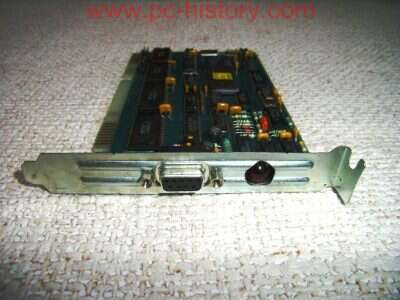
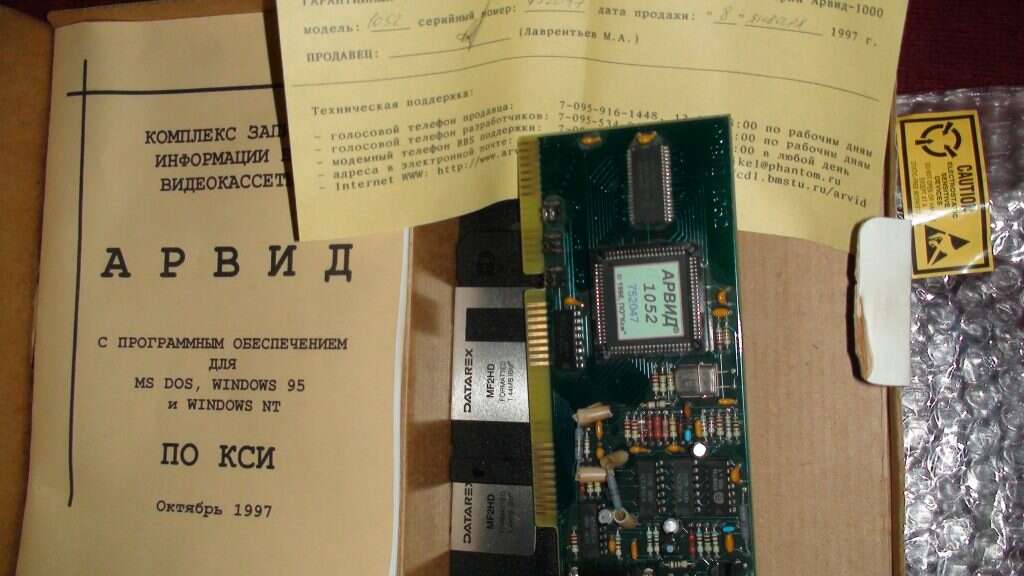
The package includes several 3½” floppy disks . Each one is loaded with 1.44MB of software, drivers and documentation. A printed documentation pamphlet with “АPВИД” on the front is also included.
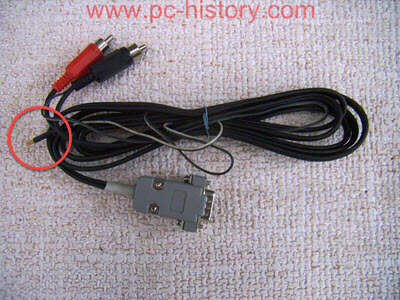
Finally, there is a custom cable that connected your computer to your VCR. Aside from the standard “video in” and “video out” connectors, this cable has an extra wire with an Infrared emitting LED at the tip (circled in red).
Here is how the card, VCR and home computer worked together:
- Your CRT screen showed the program’s interface.
- During setup, you’d use the VCR’s remote to send commands like “play” to the ArVid card.
- The ArVid card is inserted into the computer. It has an infrared diode to record those signals for your remote. It also has a connector for a special cable that carried Video IN, Video OUT and Infrared Out signals.
- The Video IN and Video OUT RCA jacks went into designated jacks on the VCR device.
- The cable has a thin wire with an infrared transmitter diode. You’d usually place it close to the front of the VCR (or tape it to the front, as shown). This diode beams out the pre-recorded signals that impersonate the remote control.
- A domestic VHS tape would store your data. A 3-hour tape could store 2GB.
Impersonating your VCR remote
After installing the ArVid card into your 386 PC and connecting all the video wires, the next challenge was getting the card to control your domestic VCR.
The ArVid had a neat way of controlling VCRs: it did so by pretending to be the VCR’s own remote-control. To accomplish this trick, users needed to “teach” the card which specific infrared remote-control signals corresponded to commands such as “play”, “stop” and “rewind”.
To “teach” the card, you needed to turn the back of your computer to face you. At the back of the card there was a shiny receiver diode. You’d point the VCR remote at it and the ArVid’s software would tell you which button to press while it recorded the signals. It could use modulated and unmodulated signals to disguise itself as your remote.
Teaching ArVid all of your VCR remote’s commands took 3 hours (… or 7 minutes, depending on who you believe 🇷🇺).
Writing data to tape
To prepare the tape for writing, ArVid tried to figure out the best “tracking alignment” for your VCR. It did so by writing a 2.5-minute data segment to tape, then reading it back while adjusting the VCR’s “read head” position to one of 6 different settings. ArVid calculated the reading “error rate” at each one of the 6 track positions. Finally, the software recommended the track alignment with the least number of errors for your VCR’s magnetic read-head.
Below: ArVid has tested 5 track-alignment options. It recommends option 3 – although it had more “double” errors than option 2 (164 of them) it had the fewest total errors at 7,887.
To write digital data from your computer to tape, you select the files using a custom file navigation program that resembled the popular “Norton Commander” application. Then pop one of these bad boys into your VCR:
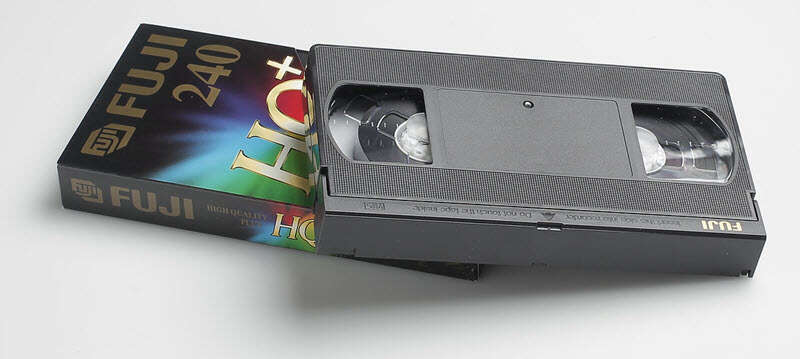
Once you give the command to “write”, the ArVid card converts your file’s data into a video signal. At the same time, ArVid flashes the infrared emitter to send a “start recording” command to the VCR – and your data starts being laid down on the VHS magnetic tape.
When the computer is finished recording the files to tape, there is a “verification” step. ArVid rewinds the tape and reads back all the data it wrote to make sure there were no critical data losses.
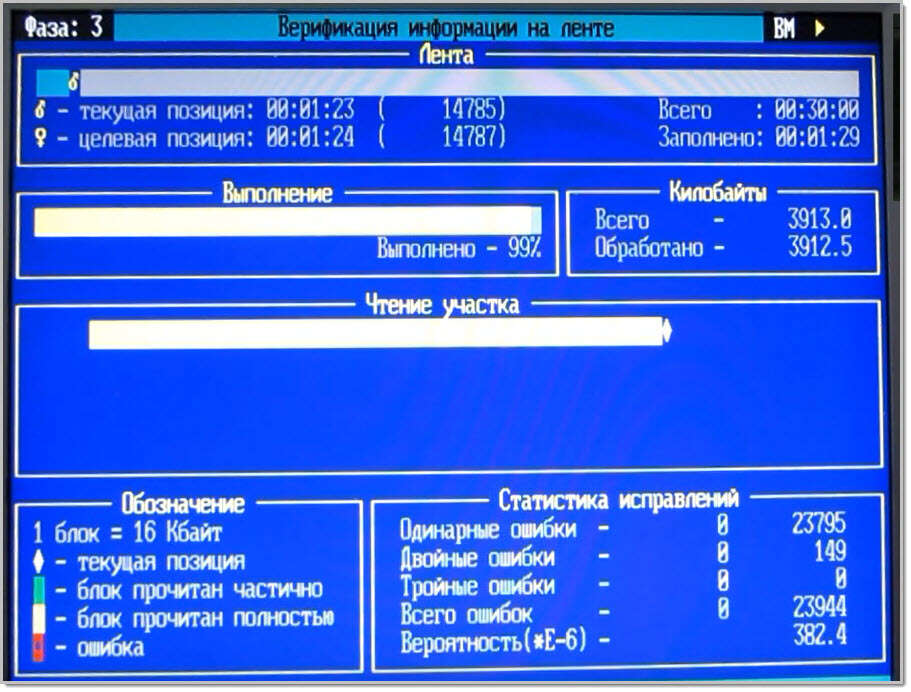
Reading data from tape
To get your data of the VHS tape and into your computer, you needed 2 things: the tape and a special “table of contents” file. That file made it so you didn’t need to view the whole tape just to get a single file. ArVid left time markers on the tape that you could use to fast-forward to a specific file.
You’d insert the VHS tape into your VCR and bring up the ArVid software in reading mode. Pick the files you want to download from the tape and go! The device would send “fast forward”, “rewind” and “play” commands to your VCR and the video signal from the tape would go out of the VCR and into the computer. The computer converts the visual signal back into digital data.
Boosting the quality of your backups
The ArVid device and its software were remarkably reliable. But there were still things you could do if you wanted your data to stay safely stored on VHS tapes for a loooong time. The main factors within your control were the kind of VCR Device you owned and the quality of the VHS tapes you bought.
For the VCR, ArVid’s manufacturer recommended the pricy Sony 130XR and the cheaper Akai-120EDG. It appears that the best VCRs are heavy ones with a metal envelope. That’s because they don’t shake around as much when the tape is forwarded, rewound and stopped. You wouldn’t want a superfast-rewinding VCR either: the slow ArVid hardware would have trouble keeping up with it… (see these comments on Russian Wikipedia🇷🇺). ArVid would not work with 60Hz NTSC VCRs.
For the VHS tapes, the best ones were tapes with a 180-minute capacity. These tapes have the thickest magnetic ribbon inside. Longer-playing tapes had thinner tape, which were mechanically weaker and would wear down from use. This “tape thickness” logic makes sense when you think about the fact that longer tapes have to be thinner to fit in a standard VHS case.
Here is a video of ArVid’s set up, writing and reading (in Russian):
The technical details
To store signal on tape reliably, the device used only the luminance portion of the video signal. And only black and white – no grays. That means that variations in colour and sound were not used when recording data.
As best as I could figure out, data was stored to tape using Non-Return-to-Zero encoding (according to some Fido7 comments🇷🇺). On the tape itself, files were recorded in sections separated by 5-second blank intervals.
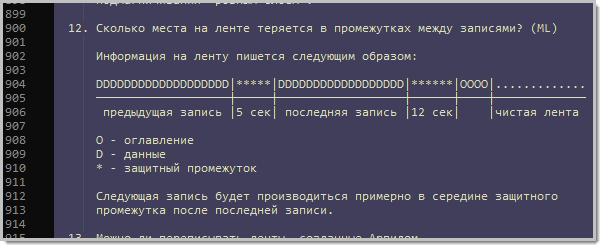
Home-use VHS tapes had worse quality than commercial-grade magnetic tape, so the makers took extra measures to detect and fix errors on tape. ArVid read and wrote data using an error correction algorithm called “Reed-Solomon with Interleaving” (I also came across mentions of a Galois algorithm). They claimed that this let the ArVid software correct up to 3 defective bytes in a code group, and a loss of up to 450 consecutive bytes could be corrected. After reading data from tape, the software performed a CRC32 check for errors, operating on every 512-byte block.
The ArVid software gave users a lot of information about the number of errors on tape. This was unique at a time when backup vendors preferred to pretend that errors didn’t exist. And it was a source of pride for the creators. This decision gave users the feedback they needed to improve their use of the system: you could see the impact of adjusting VCR tracking, purchasing better VHS tapes, switching out your VCR for another… even placing your VCR on a sturdier surface to reduce shaking and errors.
Errors could also be caused by VHS players taking a long time to “rev up to full speed” once playback started, so the ArVid software could be set to write more “initial empty frames” to make up for it.
Finally, the software saves a manifest of the files on your tape locally in “.TDR” format. This local table-of-contents gave the device a fast way of seeing and accessing the right file locations without playing through the whole tape. If the .TDR file was lost, there was also a program to recreated it by reading through an entire tape (a slow affair).
This is what the ArVid data on VHS tapes looked like if you played it through a normal TV:
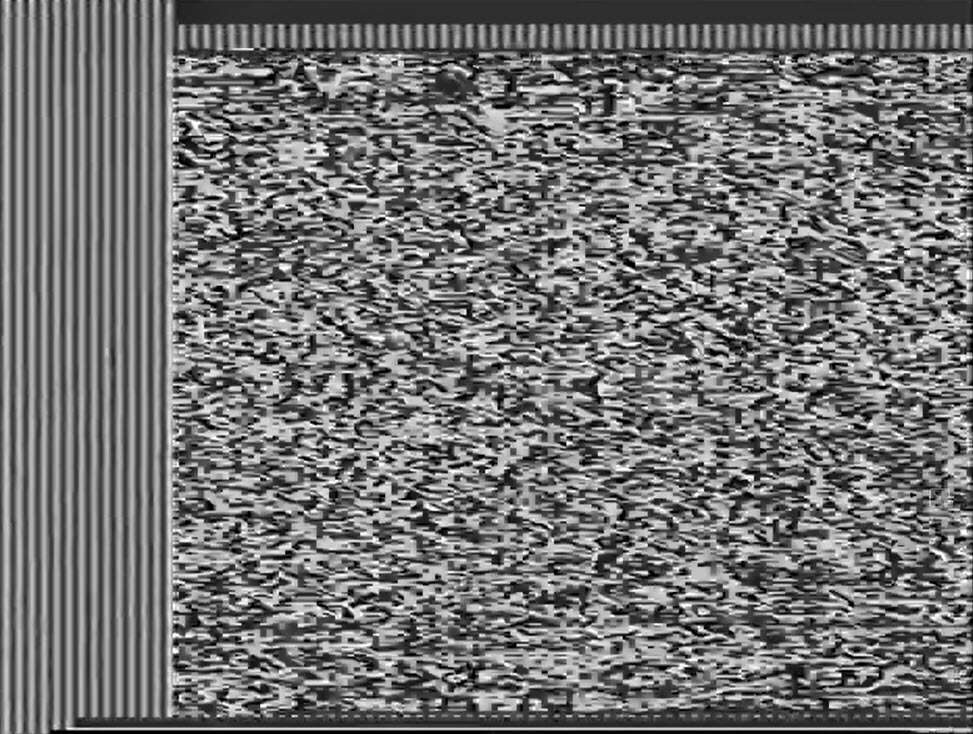
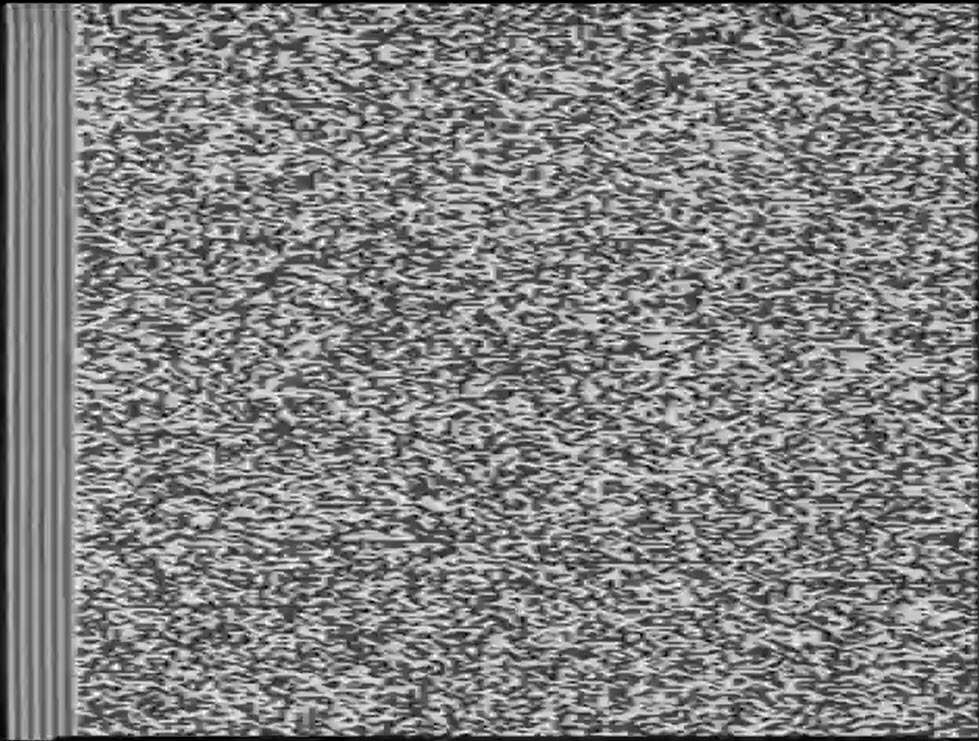
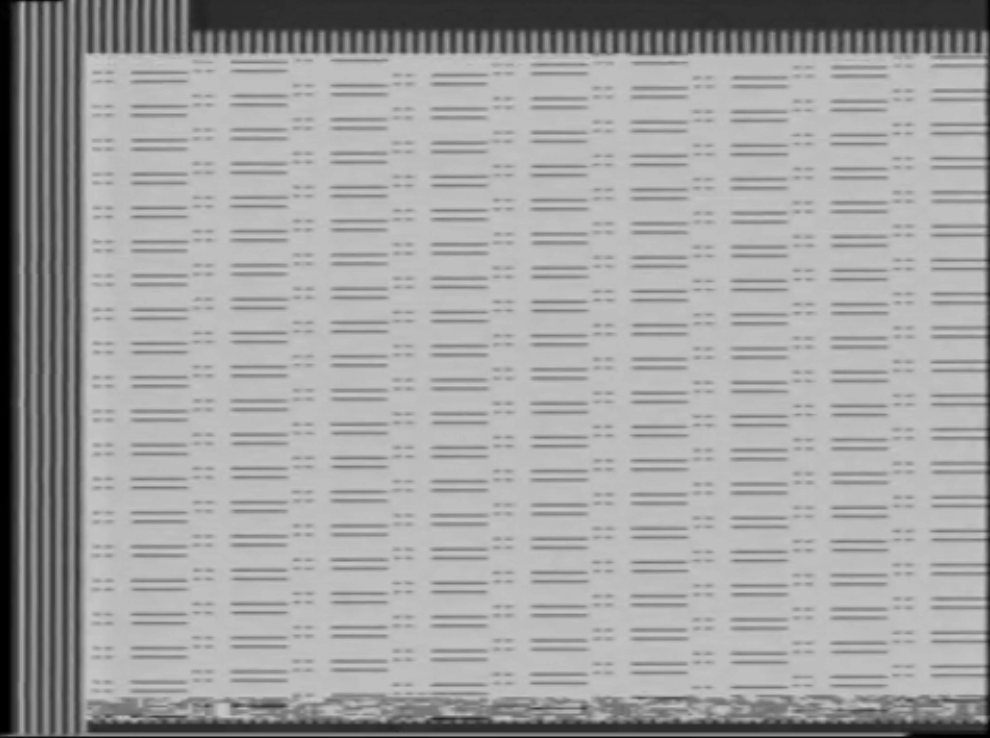
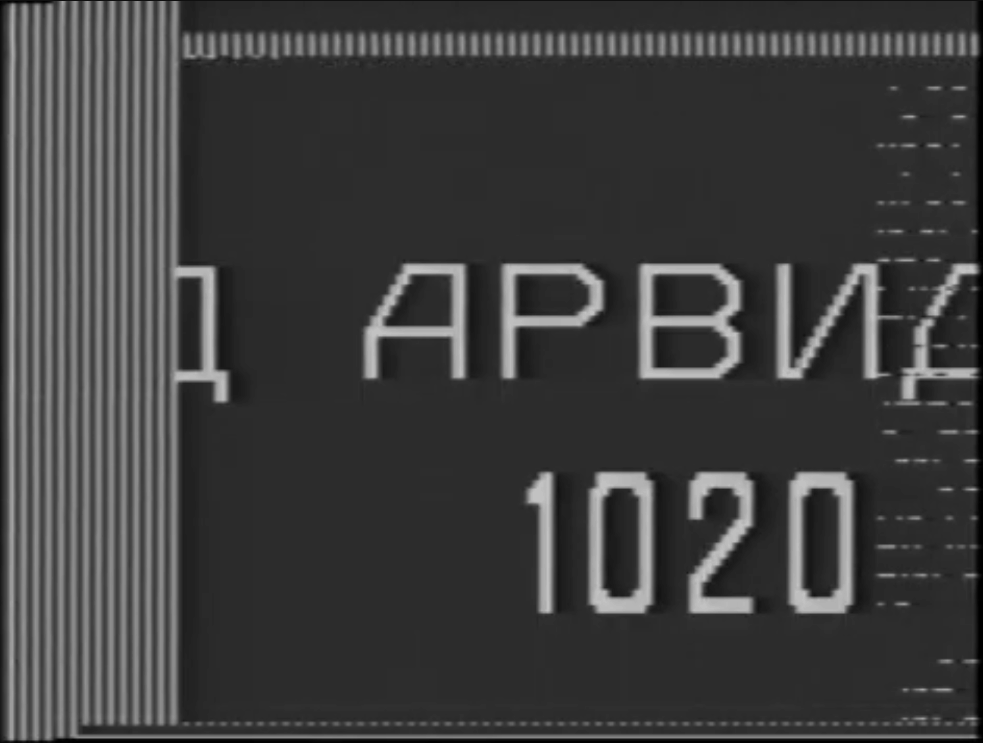
ArVid in action
Capacity and cost – how did it compare to other options?
You could record an absolutely whopping amount of data onto a single VHS tape. All models of ArVid could record 1.08 Gigabytes onto a 180-minute tape, at a 100 kilobytes/sec speed. From model 1020 and onward, they could record 2.16 Gigabytes on that same tape (at 200 kilobytes/sec).
The ArVid system cost about $80 USD, with VHS tapes costing $4 USD, and a VCR that cost on average $160 (which many people already had at home). That was a phenomenal value for storage!
To show you just how good this was for the time, here are typical storage prices in 1997:
- CD-R recording drive – would start at $300 for the drive. CD capacity ranged from 184-870 Mb. Note that the first consumer CD-R under $1,000 was only introduced in September 1995 (the Hewlett Packard model 4020i manufactured by Philips)
- ZIP drive – cost $150 for the drive and $15 per disk (100mb each)
- JAZ drive – $350 for the drive, and $85 for each disk (up to 1GB each)
- 3.5″ floppy drive – $28 CAD for the drive (source: 1997 issue of the Computer Paper in Canada) with the puny 1.44MB diskettes costing about $0.30 (as seen in this ad from the 1996 issue of Computer Paper). Although, you could get them as cheap as 14 cents if you’re willing to trust someone who runs a computers-and-apples warehouse!
- Hard Drives – typical capacity would be around 1.2GB and would cost $150 USD.
- Note that just 2 years before – in 1995 – hard drive capacity would’ve been only around 560 Mb (Source). One VHS tape could store more information than an entire hard drive.
(Prices are from DOS Days and reflect a UK-centric price point)
How long would data last on tape?
The Canadian Conservation Institute says that VHS tapes have a 10-30 year lifespan, on average.
In 2011, user Ctrl on the Sannata forum🇷🇺 used an ArVid system to successfully recover all the files they saved onto a VHS tape in 1994/1995 without any errors. That’s 16 years of reliable data storage. Ctrl used the last-generation 1052 card for both writing and recovery. Another tape from 98 (on a semi-professional BASF tape) had only minor errors that didn’t affect data restoration.
On the same thread, user Teodor claimed they had no problems reading tapes from the late 90s in 2011. This person successfully used Hitachi VHS tapes. They had errors reading data at first, with a Panasonic NV-SD450 VCR, but saw a big improvement when they switched to the JVC HR-DD868 VCR.
On the Rutracker torrent site, user korvegeta successfully read from tapes in 2011🇷🇺. Although it isn’t known exactly when they were recorded. I’d guess 1998.
Real-world use cases
The ArVid devices were sold as data backup solutions. “PO KSI”, the manufacturers, directly positioned them as competitors for backup providers like Colorado Memory Systems, QIC systems and Tandberg Data .
The nature of the medium – VHS tape – means that they can’t be read and rewritten over and over again. That’s because heavy use causes mechanical wear on the magnetic VHS tape. “Write once – read infrequently” is the ideal use case.
Throughout my ArVid research, I saw that people indeed used this device for data backup. Among them were people who used these disks at the office. This makes sense because the average home user had a hard drive that was 500mb-1.2GB in size and there simply wasn’t enough “stuff” around to fill up several 2GB Tapes’ worth of data. Remember: this was in the infancy of the World Wide Web. No MP3s. No digital video. No software websites. Purchasing ArVid as a backup solution made more sense for a small business than for a home user.
Others mentioned storing Log Data on these tapes. There wasn’t much detail beyond that, except for an author that said he personally saw academic experiment data being stored to tape using ArVid🇷🇺.
On both Russian and English forums, I found references to VHS tapes being used to shuttle Astronomical observation data between institutions. Presumably because of the cheap dollars-per-gigabyte for this medium.
People didn’t generally use these VHS tapes to exchange or sell data, like they did with floppy disks. There were several factors that made it challenging for one person to read data from a tape written by another person. These included differences in the ArVid hardware version, writing density, the quality of the VCR – even differences in the processing power between the two computers – all of them could create problems in reading a tape. This was despite the PO KSI team’s efforts to have backwards compatibility between ArVid versions. Another reason why tapes didn’t take off as a way to trade software: their capacity was overkill when most software at the time could fit on several floppies. I mean… as late as 1997 Microsoft Office was available on floppy disks. Although 46 of them…
There were several interesting “off-label” uses for Arvid:
User Шеридан (“Sheridan”) on the Yaplakal forums🇷🇺, recalled travelling to Moscow to purchase ArVid-made VHS tapes with many computer games packed on them. Sheridan then travelled back home, copied the individual games off the tape onto floppy disks and resold them to eager locals.
In the year 2000, vagrants kept stealing the lightbulb in the lobby of one enterprising ArVid use. He put on his vigilante cape and set up a security camera, an ArVid 1052 and a VCR as a kind of jerry-rigged motion-triggered camera. The system stayed on all day and video recording would only start once ArVid detected major visual changes using the Arvid Control software package (“Using ArVid as a surveillance system🇷🇺”). The culprits were caught on tape!
On Fidonet (a BBS network that also carried Usenet posts), ArVid sparked the imaginations of Russia’s IT enthusiasts. One ambitious idea was to broadcast a video signal carrying data over a regular TV channel, in order to mass-share software to the homes of people who would tune in with their ArVid.
Product improvements over time
Production of ArVid cards went on from 1993 to the summer of 1998. In those 5 short years the product had a remarkable number of improvements.
The company that made them had the acronym “PO KSI” (short for “Professional Association of Designers of Data Processing Systems” in Russian). They were based in Zelenograd, a “one industry town” outside Moscow that was a hub for microelectronics production. The town was a brainchild of Alfred Sarant and Joel Barr – two spies who escaped from America and went on to illustrious careers in the USSR.
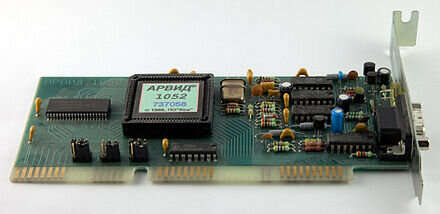
From a hardware perspective, the ISA cards were an unusual mixture of Russian-made and foreign electronic components🇷🇺. The cards kept getting bigger built-in buffers and the ability to record data at a higher density (full history of specs in the Appendix). ArVid got a major boost when PO KSI moved from using an assembly of single-function microchips to using an Actel a1020b-pl84c FPGA chip. Switching to an FPGA processor meant that the cards ran cooler and didn’t cause the computer to overheat during operation.
Note the different look when you compare the older 1020 model with its integrated circuits to the newer 1052 with its big FPGA chip. (Photo source).
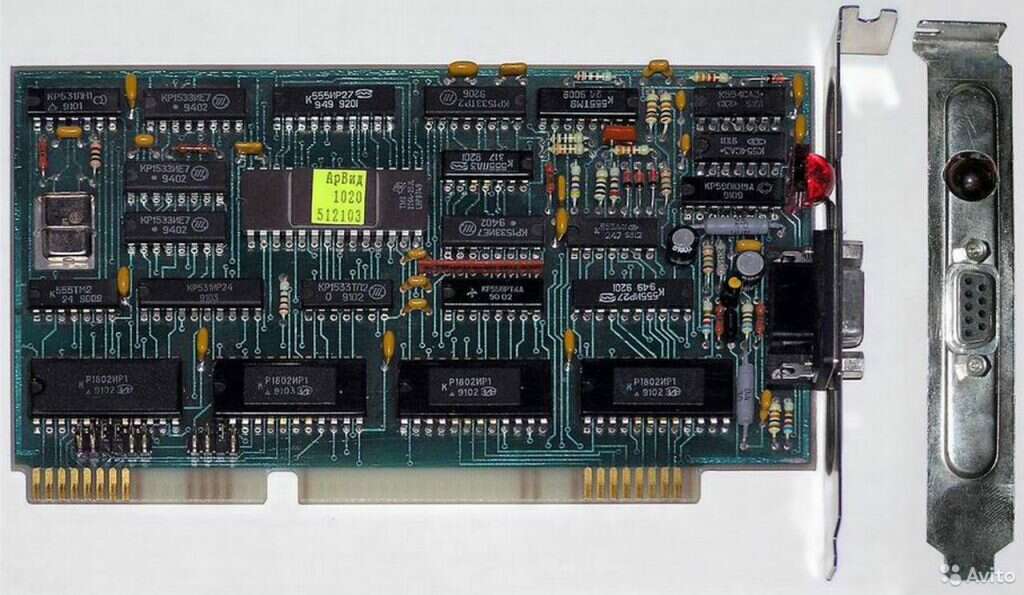
As we saw earlier, “training” the card to control your domestic VCR was critical to the system’s operation. Originally, ArVid would have had 2 infrared diodes built into the card’s back: a receiver to record signals from the remote control and a transmitter to send them ( according to YouTube comments by user “spbtvmaster”🇷🇺). But this setup meant that users had to rotate the back of their PC to face their VCR. PO KSI improved the experience by putting the infrared transmitter on a separate cable that could reach the VCR regardless of where the PC was facing.
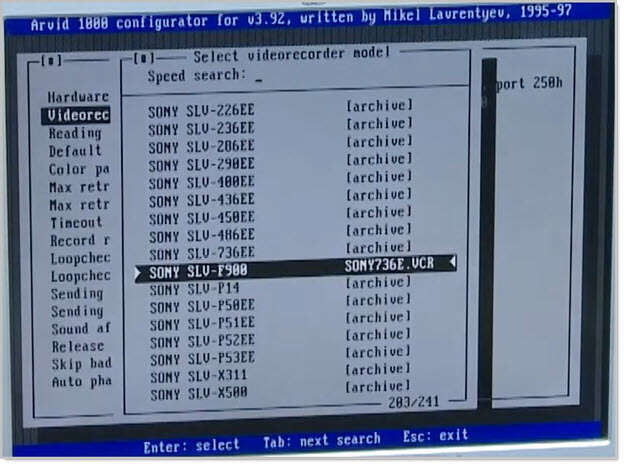
Another improvement was to completely cut out the “training” phase for various VCR’s remotes. The company pre-recorded the remote-control sequences for common VCRs at the factory and shipped them with ArVid’s software package. Customers could pick their VCR make & model from a list and be ready instantly. And if your VCR wasn’t on the preconfigured list, you could still train ArVid manually.
An extraordinary amount of documentation and software came with the ArVid device. You’d typically get:
- An up-to-date FAQ
- User Interface walkthroughs for common operations
- Descriptions of the .TDR format which was the “table of contents” for tapes
- API descriptions
- Data on compatibility with different PCs, VCRs and Tapes
I thought it was a “Catch 22” that you had to buy the device in order to read which VCRs/PCs it was compatible with. How would I know if my system is compatible if I only get this information after purchasing ArVid?
But it turned out that most of the ArVid documents were freely available from BBS systems belonging to PO KSI and authorized dealers. Just set your modem to dial the dealer’s number between the hours of 8pm and 8am, and you could download all the FAQs before you bought the system.
These BBSs were part of the FidoNet7 network, a Russian network of BBSs that used software compatible with FidoNet but independent of its political structure. Here is more info about FidoNet.
In 1997, a “newsgroup” was established at “fido7.su.hardw.support.arvid”🇷🇺. There, Mikel Lavrentyev – the main ArVid dealer – provided support to customers and prospects. There was also an official ArVid website at www.arvid.ru, now available through the Wayback Machine. In this way, with a patchwork of Web and pre-Web technologies, customers could get close to real-time support. This was quite an accomplishment for a country that was undergoing rapid – and often violent – privatization after the Soviet Union collapsed.
To learn more about this time of transition, read “Privatization in Russia” on Wikipedia; “The Russian Mob: Organized Crime in a Fledgling Democracy“; and this Russian article about how oligarchs and hustlers got their start in the computer industry🇷🇺.
While ArVid’s producers were a small company with a tiny dealer network, they did provide a warranty for the device. The pictured warranty, for a late-model ArVid 105 from 1997, covered 3 years. This was meaningful in a society where everything was uncertain and inflation from 1993 to 1995 was always higher than 200% a year
Software
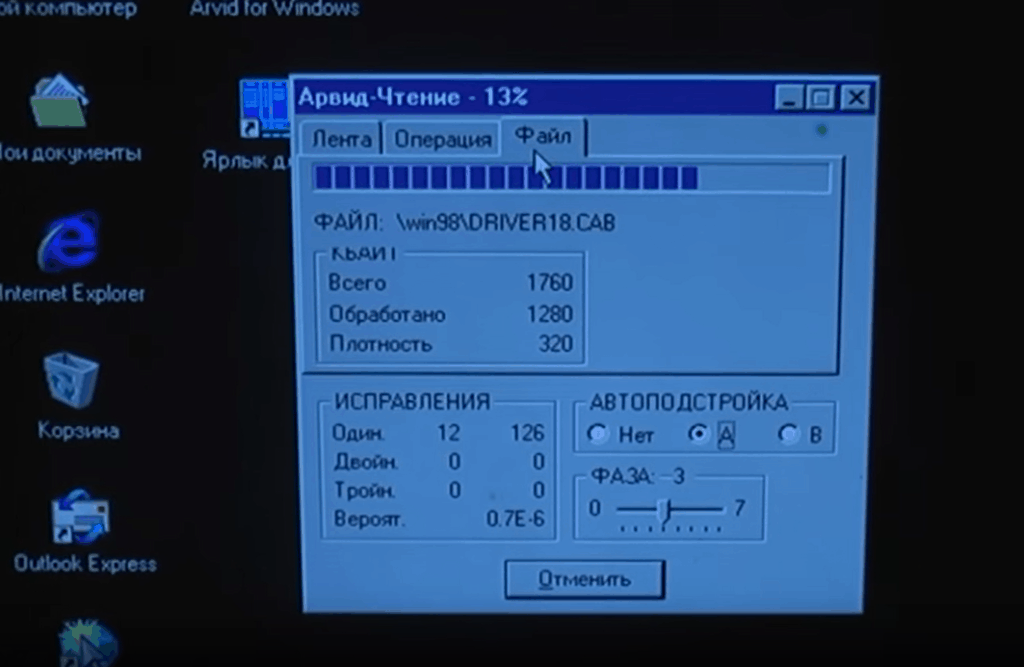
ArVid’s software could work under the DOS operating system, as well as Windows (3.1, 3.11, 95 and NT), and OS/2🇷🇺. There were unofficial ports for Linux🇷🇺 and FreeBSD🇷🇺.
The main User Interface for ArVid resembled the popular filesystem browsing program “Norton Commander” and made it simple to read and write files from a VHS tape. Other executables that came with the card let the user record Infrared signals for controlling their VCR, to change the configuration parameters, and to re-creating the special “table of contents” file that listed file locations on a particular VHS tape.
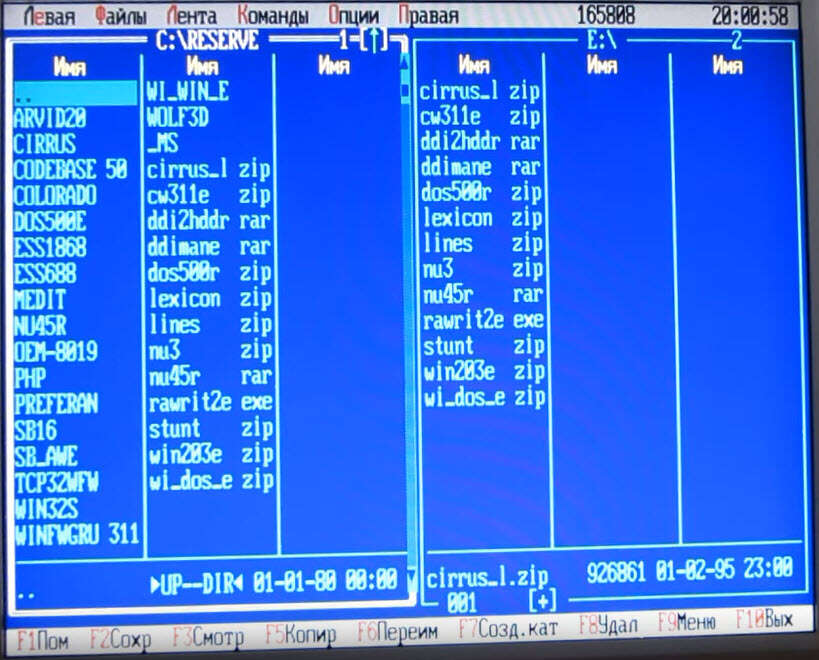
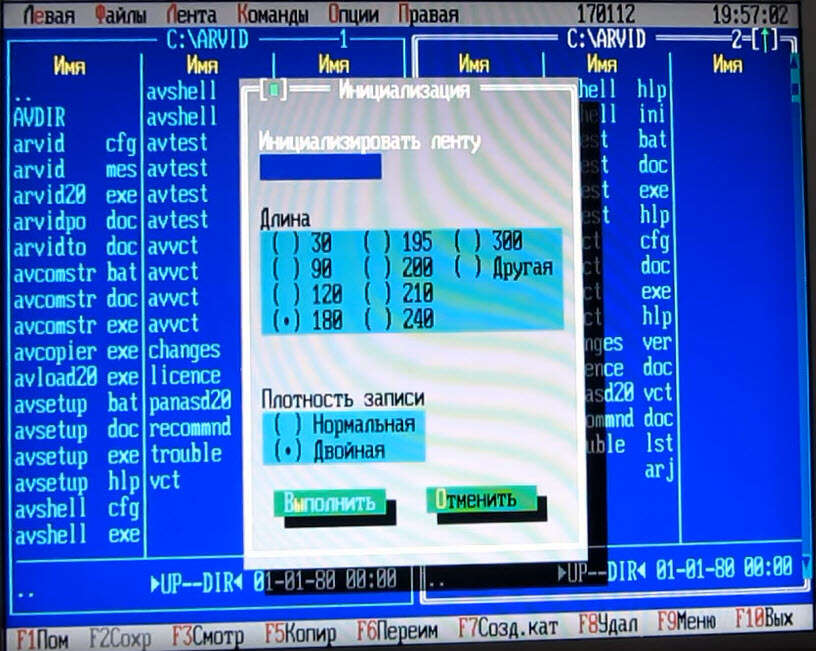
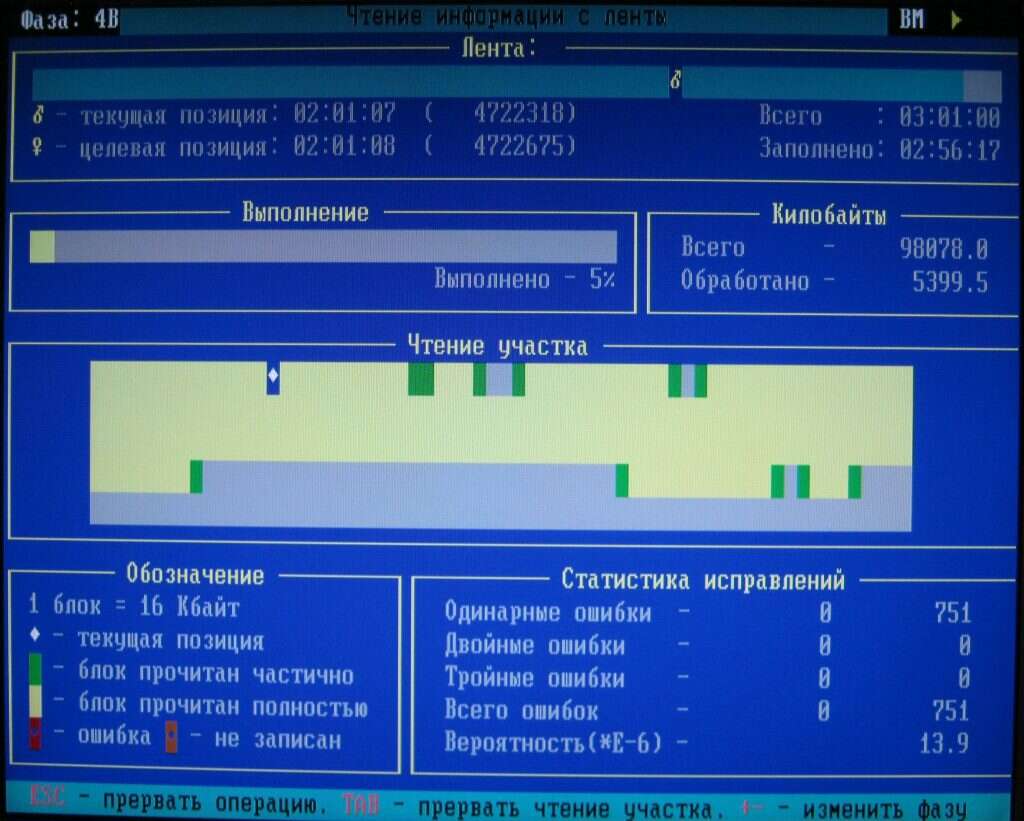
The hardware, software, documentation and “API” bundled with ArVid opened a world of possibilities. These were the tools that programmers needed to create their own applications on top of the device. One such programmer was Slava Gostrenko.
Gostrenko created 3 interesting applications:
- Arvid Draw – a program that would show the contents of a text file to your “Big Screen” Television.
- Arvid Control – a program that could act on visual signals from a TV broadcast or a surveillance camera. With this program, ArVid owners could do basic object detection / change detection in video signals. These changes could then trigger actions on the PC. The main pitch for it: while recording your favourite shows, the program could pause VCR recording during commercial breaks and resume it when the ads ended. You’d get commercial-free tapes.
- Arvid Audio – a program that used the ArVid system to record audio (3 hours of music on a $2 tape). Audio could be recorded directly from CD, Audio In, or any other source that a SoundBlaster sound card could handle.
ArVid Software repository
Here are some of the common executables that this device came with:
| File Name | Description |
|---|---|
| _AVSETUP.EXE | utility file for configuring the parameters of your VCR |
| ARVIDxx.EXE | executable that starts the main software interface for ArVid, including the driver for the controller card (here xx is the controller number (10, 20, 30, 31)) |
| AVLOADER.EXE, AVSHELL.EXE, AVCOPIER.EXE, _AVCOMST.EXE | programs that are components necessary for running the ArVid software |
| AVTESTxx.EXE | hardware test of the system (xx = controller number) |
| AVCONFIG.EXE | utility for changing software parameters |
| AVVCR.EXE | editor for VCR parameter files (infrared commands?) |
| _AVRECOV.EXE | utility for recovering on-tape table of contents from the VHS tape |
| VCT2VCR.EXE | utility for converting .vct file used earlier to .vcr file |
| _AVIRC.EXE | utility for issuing an Infrared command to the VCR |
| DELDESCR.COM | utility for fixing a specific table of contents error |
| AVSHELL.HLP | tips for operating the user interface for ArVid |
| AVVCR.HLP | file with text for operational tips for avvcr.exe |
| ARVID.MES | file with program messages |
| AVSHELL.CFG | example file for specifying programs called by the shell |
| ARVIDPO.DOC | software user guide |
| AVSETUP.DOC | instructions for the VCR parameter configuration utility |
| AVCOMSTR.DOC | guide to the command line interpreter |
| RECOMMND.DOC | general recommendations for the user |
| AVVCR.DOC, DELDESCR.DOC, AVRECOVR.DOC, VCT2VCR.DOC, AVIRC.DOC | documentation for utilities |
| CHANGES.VER | list of changes from version to version |
| RTM.EXE, DPMI16BI.OVL | DOS extension files for program operation in protected mode |
| TROUBLE.LST | “black” list of VCRs with which “ARVID-1000” does not work |
| ARVID.BAT, AVSETUP.BAT, AVCOMSTR.BAT, AVRECOVR.BAT, AVIRC.BAT | program launch files. |
Below is a set of all the ArVid-related software I could get my hands on. Some of it comes from the Rutracker Windows Software torrent tracker🇷🇺, from old-dos.ru🇷🇺 , from a Yandex Disk software dump posted by YouTube user mazalov1972 and whatever dregs I could pull from the Wayback Machine version of arvid.ru .
The contents of the file tree are listed below in an expandable element. The most interesting archives are listed at the top. The files that end with .h or .o are the ones that describe the “API”. The files ending with .01P are HPGL schematics for the circuit board (you might need to rename the extension to .hpgl to view).
- /wp-content/uploads/2023/11/software/arvid-w95-fromSannata.zip
- /wp-content/uploads/2023/11/software/Rutracker-ARVID1052.zip
- /wp-content/uploads/2023/11/software/АРВИД-from-mazalov1972.zip
- /wp-content/uploads/2023/11/software/arvid-ru-wayback.zip
- /wp-content/uploads/2023/11/software/Old-Dos Arvid 1000 software v3.46r5.ver.3.46r5.Russian.7z
- /wp-content/uploads/2023/11/software/Old-Dos ARVID for Win95.ver.1.20.017.Russian.rar
- /wp-content/uploads/2023/11/software/Old-Dos ArVid realmode drivers(for 286_1+MB RAM).zip
- /wp-content/uploads/2023/11/software/Old-Dos Arvid software v3.91tst.ver.3.91tst.Russian.zip
- /wp-content/uploads/2023/11/software/Old-Dos Arvid software v3.92tst.ver.3.92tst.Russian.zip
- /wp-content/uploads/2023/11/software/Old-Dos Arvid software v3.93tst.ver.3.93tst.Russian.zip
- /wp-content/uploads/2023/11/software/Old-Dos AV330BR4.zip.ver.3.30r4.Russian.zip
Contents of the above archives:
Folder PATH listing for volume OS
Volume serial number is 6611-6028
C:.
|
+---arvid-ru-wayback
| | 03sep97s.tgz
| | arvlin00.tgz
| |
| +---03sep97s-sys
| | \---i386
| | \---isa
| | | avt.c
| | | avtreg.h
| | |
| | \---arvid
| | | arvid20.doc
| | | avto10.doc
| | | avto20.doc
| | | avto31.doc
| | | GENERIC.1010
| | | GENERIC.1020
| | | GENERIC.1020-1052
| | | GENERIC.1030-1052
| | | HISTORY
| | | TODO
| | |
| | +---1010
| | | avt.c
| | | avtreg.h
| | | README
| | |
| | +---1020
| | | avt.c
| | | avtreg.h
| | | README
| | |
| | +---1020-1052
| | | avt.c
| | | avtreg.h
| | |
| | +---1030-1052
| | | avt.c
| | | avtreg.h
| | |
| | +---2.2.2
| | | devices.i386.avt
| | | files.i386.avt
| | | INSTALL-2.2.2
| | | LINT.avt
| | | userconfig.c.diff
| | |
| | +---do-2.2.2
| | | devices.i386.avt
| | | files.i386.avt
| | | INSTALL
| | | LINT.avt
| | | userconfig.c.diff
| | |
| | +---ic
| | | i8237.h
| | | i8237.h.dist
| | |
| | \---isa
| | avt.c
| | avt.h
| | avtreg.h
| | isa.c
| | isa.c.dist
| | isa_device.h
| | isa_device.h.dist
| |
| +---avdraw
| | AVDRAW.CFG
| | AVDRAW.DOC
| | AVDRAW.EXE
| | COMMENT
| | DESCRIPT.ION
| | DISCLAIM.ERS
| | FILE_ID.DIZ
| | HTTP.WWW
| | TST_DRAW.TXT
| |
| +---av_audio
| | AUDIODRV.CRK
| | AUTOPLAY.BAT
| | AVAUDIO.CFG
| | AVAUDIO.DOC
| | AVA_DPMI.ZIP
| | AVDIGPAK.DOC
| | AVPLAYER.EXE
| | AVRECORD.EXE
| | CD2AV.EXE
| | COMMENT
| | CRACKER.EXE
| | DESCRIPT.ION
| | DIGPAK.ZIP
| | DIGP_PRG.DOC
| | DISCLAIM.ERS
| | ENGLISH.DOC
| | FILE_ID.DIZ
| | FUTURE.DOC
| | HTTP.WWW
| | SB_DFLT.EXE
| | TECHNOTE.TXT
| | WAKEMEUP.BAT
| | WAV2AV.EXE
| | WHATSNEW
| |
| \---av_ctrl
| AV_CTRL.CFG
| AV_CTRL.DOC
| AV_CTRL.EXE
| AV_SHOW.EXE
| CHOICE.COM
| COMMENT
| DESCRIPT.ION
| DISCLAIM.ERS
| DPMI16BI.OVL
| EXAMPLE.BAT
| FF.BAT
| FILE_ID.DIZ
| HTTP.WWW
| ORT_LOGO.PTN
| PLAY.BAT
| RECORD.BAT
| REW.BAT
| RTM.EXE
| RTR_LOGO.PTN
| STOP.BAT
| WHATSNEW
|
+---arvid-w95-fromSannata
| \---arvid
| | ARVID.TXT
| | ARVIDFAQ.TXT
| | ARVID_TI.TXT
| | README.1ST
| |
| \---VARVID1B
| ARVID.INF
| ARVIDW95.DOC
| FILE_ID.DIZ
| REGFORM.TXT
| VARVID.386
| VARVID.REG
| VARVID.TXT
|
+---Old-Dos Arvid 1000 software v3.46r5.ver.3.46r5.Russian
| \---AD346R5
| | ARVID10.ARJ
| | ARVID20.ARJ
| | ARVID31.ARJ
| | AVSHELL.CFG
| | COMMON.ARJ
| | DIRINFO
| | DOC-RUSS.ARJ
| | FILE_ID.DIZ
| | HLP-RUSS.ARJ
| | INSTALL.CFG
| | INSTALL.EXE
| | LNG-ENGL.ARJ
| | LNG-RUSS.ARJ
| | README.1ST
| |
| +---ARVID10
| | ARVID10.EXE
| | AVTEST10.EXE
| |
| +---ARVID20
| | ARVID20.EXE
| | AVTEST20.EXE
| |
| +---ARVID31
| | ARVID31.EXE
| | AVTEST31.EXE
| |
| +---COMMON
| | AV1-OS2.ICO
| | AV2-OS2.ICO
| | AV2-WIN.ICO
| | AV3-OS2.ICO
| | AV3-WIN.ICO
| | AVBW.PAL
| | AVCOLOR.PAL
| | AVCONFIG.EXE
| | AVCOPIER.EXE
| | AVIRC.EXE
| | AVLOADER.EXE
| | AVSHELL.EXE
| | AVVCR.EXE
| | DELDESCR.EXE
| | DPMI16BI.OVL
| | RTM.EXE
| | VCRFILES.DAT
| | VCRNAMES.DAT
| | VCT2VCR.EXE
| | _AVCOMST.EXE
| | _AVIRC.EXE
| | _AVRECOV.EXE
| | _AVSETUP.EXE
| |
| +---DOC-RUSS
| | | ARVIDPO.DOC
| | | AVCOMSTR.DOC
| | | AVCONFIG.DOC
| | | AVIRC.DOC
| | | AVRECOVR.DOC
| | | AVSETUP.DOC
| | | AVTEST.DOC
| | | AVTO10.DOC
| | | AVTO20.DOC
| | | AVTO31.DOC
| | | AVVCR.DOC
| | | CHANGES.VER
| | | DELDESCR.DOC
| | | LICENCE.DOC
| | | PALETTE.DOC
| | | README.DOC
| | | RECOMMND.DOC
| | | TROUBLE.LST
| | | VCT2VCR.DOC
| | |
| | \---ADVANCED
| | 1031DESC.TXT
| | 1051DESC.TXT
| | 1052DESC.TXT
| | CABLES.TXT
| | HINTS.TXT
| | K1031.TXT
| | K1031_1.01P
| | K1031_2.01P
| | SCART.TXT
| | TDRFMT.TXT
| |
| +---HLP-RUSS
| | AVRECOVR.HLP
| | AVSETUP.HLP
| | AVSHELL.HLP
| | AVVCR.HLP
| |
| +---LNG-ENGL
| | ARVID.MES
| |
| \---LNG-RUSS
| ARVID.MES
|
+---Old-Dos ARVID for Win95.ver.1.20.017.Russian
| arwin1-2.ima
| arwin2-2.ima
|
+---Old-Dos ArVid realmode drivers(for 286_1+MB RAM)
| AVSHELLR.EXE
| REALMODE.TXT
| _AVCOMSR.EXE
|
+---Old-Dos Arvid software v3.91tst.ver.3.91tst.Russian
| \---AD391TST
| | ARVID20.ARJ
| | ARVID32.ARJ
| | AVSHELL.CFG
| | COMMON.ARJ
| | DIRINFO
| | DOC-RUSS.ARJ
| | FILE_ID.DIZ
| | HLP-RUSS.ARJ
| | INSTALL.CFG
| | INSTALL.EXE
| | LNG-ENGL.ARJ
| | LNG-RUSS.ARJ
| | README.1ST
| |
| +---ARVID20
| | ARVID20.EXE
| | AVTEST20.EXE
| |
| +---ARVID32
| | ARVID32.EXE
| | AVTEST32.EXE
| |
| +---COMMON
| | ANSI2OEM.COD
| | AV1-OS2.ICO
| | AV2-OS2.ICO
| | AV2-WIN.ICO
| | AV3-OS2.ICO
| | AV3-WIN.ICO
| | AVBW.PAL
| | AVCOLOR.PAL
| | AVCONFIG.EXE
| | AVCOPIER.EXE
| | AVLOADER.EXE
| | AVSHELLX.EXE
| | AVVCR.EXE
| | DELDESCR.EXE
| | DPMI16BI.OVL
| | RTM.EXE
| | VCRFILES.DAT
| | VCRNAMES.DAT
| | VCT2VCR.EXE
| | _AVCOMSX.EXE
| | _AVIRC.EXE
| | _AVRECOV.EXE
| | _AVSETUP.EXE
| |
| +---DOC-RUSS
| | ARVIDPO.DOC
| | AVCOMSTR.DOC
| | AVCONFIG.DOC
| | AVIRC.DOC
| | AVRECOVR.DOC
| | AVSETUP.DOC
| | AVTEST.DOC
| | AVTO10.DOC
| | AVTO20.DOC
| | AVTO31.DOC
| | AVVCR.DOC
| | CHANGES.VER
| | DELDESCR.DOC
| | LICENCE.DOC
| | PALETTE.DOC
| | README.DOC
| | RECOMMND.DOC
| | TROUBLE.LST
| | VCT2VCR.DOC
| |
| +---HLP-RUSS
| | AVRECOVR.HLP
| | AVSETUP.HLP
| | AVSHELL.HLP
| | AVVCR.HLP
| |
| +---LNG-ENGL
| | ARVID.MES
| |
| \---LNG-RUSS
| ARVID.MES
|
+---Old-Dos Arvid software v3.92tst.ver.3.92tst.Russian
| +---AD392FIX
| | AVCONFIG.EXE
| | README
| |
| \---AD392TST
| | ARVID20.ARJ
| | ARVID32.ARJ
| | AVSHELL.CFG
| | COMMON.ARJ
| | DIRINFO
| | DOC-RUSS.ARJ
| | FILE_ID.DIZ
| | HLP-RUSS.ARJ
| | INSTALL.CFG
| | INSTALL.EXE
| | LNG-ENGL.ARJ
| | LNG-RUSS.ARJ
| | README.1ST
| |
| +---ARVID20
| | ARVID20.EXE
| | AVTEST20.EXE
| |
| +---ARVID32
| | ARVID32.EXE
| | AVTEST32.EXE
| |
| +---COMMON
| | ANSI2OEM.COD
| | AV1-OS2.ICO
| | AV2-OS2.ICO
| | AV2-WIN.ICO
| | AV3-OS2.ICO
| | AV3-WIN.ICO
| | AVBW.PAL
| | AVCOLOR.PAL
| | AVCONFIG.EXE
| | AVCOPIER.EXE
| | AVLOADER.EXE
| | AVSHELL.EXE
| | AVVCR.EXE
| | DELDESCR.EXE
| | DPMI16BI.OVL
| | RTM.EXE
| | VCRFILES.DAT
| | VCRNAMES.DAT
| | VCT2VCR.EXE
| | _AVCOMSX.EXE
| | _AVIRC.EXE
| | _AVRECOV.EXE
| | _AVSETUP.EXE
| |
| +---DOC-RUSS
| | | ARVIDPO.DOC
| | | AVCOMSTR.DOC
| | | AVCONFIG.DOC
| | | AVIRC.DOC
| | | AVRECOVR.DOC
| | | AVSETUP.DOC
| | | AVTEST.DOC
| | | AVTO10.DOC
| | | AVTO20.DOC
| | | AVTO31.DOC
| | | AVVCR.DOC
| | | CHANGES.VER
| | | DELDESCR.DOC
| | | LICENCE.DOC
| | | PALETTE.DOC
| | | README.DOC
| | | RECOMMND.DOC
| | | TROUBLE.LST
| | | VCT2VCR.DOC
| | |
| | \---ADVANCED
| | 1031DESC.TXT
| | 1051DESC.TXT
| | 1052DESC.TXT
| | AVTFMT.TXT
| | CABLES.TXT
| | HINTS.TXT
| | K1031.TXT
| | K1031_1.01P
| | K1031_2.01P
| | K1052.TXT
| | K1052_1.01P
| | K1052_2.01P
| | SCART.TXT
| | TDRFMT.TXT
| |
| +---HLP-RUSS
| | AVRECOVR.HLP
| | AVSETUP.HLP
| | AVSHELL.HLP
| | AVVCR.HLP
| |
| +---LNG-ENGL
| | ARVID.MES
| |
| \---LNG-RUSS
| ARVID.MES
|
+---Old-Dos Arvid software v3.93tst.ver.3.93tst.Russian
| \---AD393TST
| | ARVID20.ARJ
| | ARVID32.ARJ
| | AVSHELL.CFG
| | COMMON.ARJ
| | DIRINFO
| | DOC-RUSS.ARJ
| | FILE_ID.DIZ
| | HLP-RUSS.ARJ
| | INSTALL.CFG
| | INSTALL.EXE
| | LNG-ENGL.ARJ
| | LNG-RUSS.ARJ
| | README.1ST
| |
| +---ARVID20
| | ARVID20.EXE
| | AVTEST20.EXE
| |
| +---ARVID32
| | ARVID32.EXE
| | AVTEST32.EXE
| |
| +---COMMON
| | ANSI2OEM.COD
| | AV1-OS2.ICO
| | AV2-OS2.ICO
| | AV2-WIN.ICO
| | AV3-OS2.ICO
| | AV3-WIN.ICO
| | AVBW.PAL
| | AVCOLOR.PAL
| | AVCONFIG.EXE
| | AVCOPIER.EXE
| | AVLOADER.EXE
| | AVSHELL.EXE
| | AVVCR.EXE
| | DELDESCR.EXE
| | DPMI16BI.OVL
| | RTM.EXE
| | VCRFILES.DAT
| | VCRNAMES.DAT
| | VCT2VCR.EXE
| | _AVCOMSX.EXE
| | _AVIRC.EXE
| | _AVRECOV.EXE
| | _AVSETUP.EXE
| |
| +---DOC-RUSS
| | | ARVIDPO.DOC
| | | AVCOMSTR.DOC
| | | AVCONFIG.DOC
| | | AVIRC.DOC
| | | AVRECOVR.DOC
| | | AVSETUP.DOC
| | | AVTEST.DOC
| | | AVTO10.DOC
| | | AVTO20.DOC
| | | AVTO31.DOC
| | | AVVCR.DOC
| | | CHANGES.VER
| | | DELDESCR.DOC
| | | LICENCE.DOC
| | | PALETTE.DOC
| | | README.DOC
| | | RECOMMND.DOC
| | | TROUBLE.LST
| | | VCT2VCR.DOC
| | |
| | \---ADVANCED
| | 1031DESC.TXT
| | 1051DESC.TXT
| | 1052DESC.TXT
| | AVTFMT.TXT
| | CABLES.TXT
| | HINTS.TXT
| | K1031.TXT
| | K1031_1.01P
| | K1031_2.01P
| | K1052.TXT
| | K1052_1.01P
| | K1052_2.01P
| | SCART.TXT
| | TDRFMT.TXT
| |
| +---HLP-RUSS
| | AVRECOVR.HLP
| | AVSETUP.HLP
| | AVSHELL.HLP
| | AVVCR.HLP
| |
| +---LNG-ENGL
| | ARVID.MES
| |
| \---LNG-RUSS
| ARVID.MES
|
+---Old-Dos AV330BR4.zip.ver.3.30r4.Russian
| \---AV330BR4
| | ARVID10.ARJ
| | ARVID20.ARJ
| | AVSHELL.CFG
| | COMMON.ARJ
| | DIRINFO
| | DOC-RUSS.ARJ
| | FILE_ID.DIZ
| | INSTALL.CFG
| | INSTALL.EXE
| | JUMPERS.CFG
| | LNG-ENGL.ARJ
| | LNG-RUSS.ARJ
| | README.1ST
| | VCR.ARJ
| |
| +---ARVID10
| | ARVID.TBL
| | ARVID10.EXE
| | AVTEST10.EXE
| |
| +---ARVID20
| | ARVID20.EXE
| | AVTEST20.EXE
| |
| +---COMMON
| | AVBW.PAL
| | AVCOLOR.PAL
| | AVCOPIER.EXE
| | AVLOADER.EXE
| | AVSETVCR.EXE
| | AVSHELL.EXE
| | AVSHELLX.EXE
| | AVVCR.EXE
| | DELDESCR.COM
| | DPMI16BI.OVL
| | RTM.EXE
| | VCT2VCR.EXE
| | _AVCOMST.EXE
| | _AVCOMSX.EXE
| | _AVIRC.EXE
| | _AVRECOV.EXE
| | _AVSETUP.EXE
| |
| +---DOC-RUSS
| | ARVIDPO.DOC
| | AVCOMSTR.DOC
| | AVIRC.DOC
| | AVRECOVR.DOC
| | AVSETUP.DOC
| | AVSETVCR.DOC
| | AVTEST.DOC
| | AVTO10.DOC
| | AVTO20.DOC
| | AVVCR.DOC
| | CHANGES.NEW
| | CHANGES.VER
| | DELDESCR.DOC
| | LICENCE.DOC
| | PALETTE.DOC
| | README.DOC
| | RECOMMND.DOC
| | TROUBLE.LST
| | VCR.DOC
| | VCT2VCR.DOC
| |
| +---LNG-ENGL
| | ARVID.MES
| | AVRECOVR.HLP
| | AVSETUP.HLP
| | AVSHELL.HLP
| | AVVCR.HLP
| |
| +---LNG-RUSS
| | ARVID.MES
| | AVRECOVR.HLP
| | AVSETUP.HLP
| | AVSHELL.HLP
| | AVVCR.HLP
| |
| \---VCR
| AIWA510M.VCR
| AIWAD925.VCR
| AIWAG910.VCR
| AIWAK140.VCR
| AKAIF220.VCR
| AKAIG40.VCR
| AKAIR100.VCR
| AKAIR110.VCR
| AKAIR120.VCR
| AKAIR150.VCR
| AKAIR9EV.VCR
| AKAIV440.VCR
| AKAIV53.VCR
| AKAIVS35.VCR
| AUDIVC33.VCR
| CROW3721.VCR
| DAEN110.VCR
| DAEW3327.VCR
| DAEW4153.VCR
| DAEW4379.VCR
| DAEWXXXX.VCR
| ELEC1230.VCR
| ELEC8220.VCR
| FISH300.VCR
| FISHU908.VCR
| FUNA5000.VCR
| FUNA8008.VCR
| FUNAG3EE.VCR
| FUNAV3EE.VCR
| GOLD1295.VCR
| GOLDR500.VCR
| HITAM747.VCR
| HITAP60.VCR
| HITAP75.VCR
| HITAV517.VCR
| JVC830.VCR
| JVCD520.VCR
| JVCD521.VCR
| JVCDX20.VCR
| JVCJ1200.VCR
| JVCP28A.VCR
| JVCP29A.VCR
| JVCP7.VCR
| KOLOKVR5.VCR
| NECN9083.VCR
| NOKI3719.VCR
| ORIO500E.VCR
| ORION688.VCR
| ORION700.VCR
| PANAD100.VCR
| PANAF200.VCR
| PANAG12.VCR
| PANAG35.VCR
| PANAG40.VCR
| PANAG50.VCR
| PANAG7EE.VCR
| PANANV04.VCR
| PANANV22.VCR
| PANANV25.VCR
| PANANV43.VCR
| PANANV7E.VCR
| PANAP04.VCR
| PANAP11.VCR
| PANASD11.VCR
| PANASD20.VCR
| PANASD25.VCR
| PANASD2A.VCR
| PANASD3E.VCR
| PHIL201.VCR
| PHIL253.VCR
| PHIL3242.VCR
| PHIL3260.VCR
| PHIL6448.VCR
| ROYAVC10.VCR
| SAMS1261.VCR
| SAMS9001.VCR
| SANK3721.VCR
| SANY1150.VCR
| SANY4100.VCR
| SANY4250.VCR
| SANYZ3R.VCR
| SCHN568.VCR
| SEG8000.VCR
| SHAR6V3.VCR
| SHAR790E.VCR
| SHARA105.VCR
| SHARB68B.VCR
| SHARPM11.VCR
| SHARV682.VCR
| SHARVC30.VCR
| SHARVC77.VCR
| SHIV930R.VCR
| SHIVM5.VCR
| SHIVS911.VCR
| SONY216E.VCR
| SONY286.VCR
| SONY436E.VCR
| SONY486.VCR
| SONY486E.VCR
| SONYF385.VCR
| SONYK65.VCR
| SONYP116.VCR
| SONYP50E.VCR
| SONYP51E.VCR
| SONYX311.VCR
| SONYX50.VCR
| SONYX57.VCR
| SONYX711.VCR
| SONYXR13.VCR
| SONYXR9P.VCR
| SUPR40.VCR
| SUPRSV91.VCR
| SUPRSV95.VCR
| SUPRT21.VCR
| SUPRT25.VCR
| TELE5930.VCR
| TENS2000.VCR
| THOM4450.VCR
| TICO3125.VCR
| TOSH109C.VCR
| TOSH204.VCR
| TOSH303C.VCR
| TOSH330.VCR
| TOSHV203.VCR
| TOSHV404.VCR
| UNKNOWN.VCR
|
+---Rutracker-ARVID1052
| | 03SEP97P.TGZ
| | 03SEP97S.TGZ
| | 1031DESC.TXT
| | 1051DESC.TXT
| | 1052DESC.TXT
| | 22JUN97P.TGZ
| | 22JUN97S.TGZ
| | ad393tst.arj
| | AD393TST.ZIP
| | ARVID.TXT
| | arvid20.zip
| | ARVID31.RAR
| | ARVIDFAQ.ZIP
| | Arvidpo.htm
| | arvid_dos_v346r5.rar
| | ARVLIN00.TGZ
| | arwin015.rar
| | ARWIN018.ZIP
| | arwincom.arj
| | av-vcr.arj
| | av2rx096.rar
| | av346r5.arj
| | AVARCH.EXE
| | AVARCH20.EXE
| | Avcomstr.htm
| | AVCTRL09.ZIP
| | Avsetup.htm
| | Avtest.htm
| | AVTUT10.ZIP
| | AVTUT11.ZIP
| | AVTUT12.ZIP
| | Avvct.htm
| | av_sales.arj
| | av_tech.arj
| | AW120016.ZIP
| | AW120017.ZIP
| | DESCRIPT.ION
| | DOWNLOAD.rar
| | dsk3-1.exe
| | dsk3-2.exe
| | dsk3-3.exe
| | dsk3-4.exe
| | files-2.bbs
| | inet_arvid.zip
| | INSTALL.BAT
| | IRC10.ZIP
| | PAFTDR11.ZIP
| | READ.ME
| | Recommnd.htm
| | Trouble.htm
| | ????????? ?????. ? ???????? ????? - ?????? - ???????? ???????? ????????.pdf
| | ??????????.pdf
| |
| +---03SEP97P
| | | 03SEP97P.tar
| | |
| | \---03SEP97P
| | \---packages
| | \---arvid
| | | arvidapi.h
| | | README
| | | TODO
| | |
| | +---ARVLinux
| | | | Makefile
| | | | rules.make
| | | | VERSION
| | | |
| | | +---app
| | | | +---arvsbox
| | | | \---xarvideo
| | | | Imakefile
| | | | xarvideo.c
| | | |
| | | +---doc
| | | | arv-rw
| | | | questns.txt
| | | | todo.txt
| | | |
| | | +---drv
| | | | | arvid-kernel.patch
| | | | | INSTALL
| | | | | install-drv
| | | | |
| | | | \---drivers
| | | | \---char
| | | | \---arvid
| | | | arv-data.c
| | | | arv-data.h
| | | | arv-hlp.h
| | | | arv-io.c
| | | | arv-io.h
| | | | arv-isr.c
| | | | arv-isr.h
| | | | arv-ll.c
| | | | arv-ll.h
| | | | arvid-ki.c
| | | | arvid-ki.h
| | | | arvid.h
| | | | Makefile
| | | | tracing.c
| | | | tracing.h
| | | |
| | | +---include
| | | +---lib
| | | \---script
| | | arvsave
| | | mkarv
| | |
| | +---audio
| | | avread.c
| | | avread.old
| | | avwrite.c
| | | avwrite.old
| | | Makefile
| | | README
| | |
| | +---avcopier
| | | | .make.Avcopier
| | | | .make.Ident
| | | | 200f1ab
| | | | avcopier.c
| | | | Avcopier.cpp
| | | | avreadtof.c
| | | | Ident.cpp
| | | | Makefile
| | | | README
| | | | test1
| | | |
| | | +---c++
| | | | avreadtof.c
| | | | bin.inf
| | | | main.cpp
| | | | Makefile
| | | | ReadSector.cpp
| | | | ReadSector.hpp
| | | |
| | | +---sector
| | | | make.Sector
| | | | tmp.cpp
| | | |
| | | \---test
| | | avreadtof.c
| | | bin.inf
| | | main.cpp
| | | Makefile
| | | ReadSector.cpp
| | | ReadSector.hpp
| | | ReadSector.hpp.b
| | | test.cpp
| | |
| | +---avinfo
| | | avinfo.c
| | | Makefile
| | | README
| | |
| | +---avphase
| | | avphase.c
| | | README
| | |
| | +---avread
| | | avtdr.c
| | |
| | +---avshell
| | | avshell.c
| | |
| | +---avtape
| | | Makefile
| | | tape.c
| | |
| | +---doc
| | | | arvid.cfg
| | | | arvid_f0.txt
| | | | avcomstr.doc
| | | | avtfmt.txt
| | | | avtfmtmy.txt
| | | | README
| | | | tdrfmt.txt
| | | | vcrtab.txt
| | | |
| | | \---hard
| | | 1020.TXT
| | | 1031.TXT
| | | 1051.TXT
| | | 1052.TXT
| | |
| | +---include
| | | .README
| | | avt.tbl
| | | avt100.c
| | | avtreg.h
| | | avtreg.h.old
| | | crc.c
| | | errormes.h
| | | Irc.hpp
| | | rsgen.h
| | | Sector.hpp
| | | Tape.h
| | | Tape.hpp
| | | TapeDir.hpp
| | | tdr.h
| | |
| | +---lib
| | | avt100.o
| | | avt_rs.o
| | | crc.o
| | |
| | +---raw
| | | aaa
| | | avread.c
| | | avreadrs.c
| | | avwrite.c
| | | Makefile
| | | raw.c
| | | raw_make
| | | README
| | | write.c
| | |
| | +---sys
| | | 200-100as
| | | 200.c
| | | 200f1ab
| | | d100.c
| | | Makefile
| | | README
| | | readrsd.c
| | | RS
| | | rsc.c
| | | rsc.c.d
| | | rsd.c
| | |
| | +---tdr
| | | make.TapeDir
| | | make.Tdr
| | | TapeDir
| | | TapeDir.cpp
| | | Tdr.cpp
| | | Tdr.hpp
| | | tdr_dir.c
| | | tdr_dir.c.d
| | |
| | +---vcr
| | | | IrcTrn
| | | | IrcTrn.cpp
| | | | make.IrcTrn
| | | | Makefile
| | | | vcr.c
| | | | vcread.c
| | | | vcrwrite.c
| | | | viewvcr.c
| | | | viewvcr.cpp.old
| | | |
| | | \---asm
| | | 17E4
| | | 17E4.asm
| | | 1BD3.asm
| | | irctomod.asm
| | |
| | \---X11
| | Imakefile
| | xarvideo.c
| |
| +---03SEP97S
| | \---sys
| | \---i386
| | \---isa
| | | avt.c
| | | avtreg.h
| | |
| | \---arvid
| | | arvid20.doc
| | | avto10.doc
| | | avto20.doc
| | | avto31.doc
| | | GENERIC.1010
| | | GENERIC.1020
| | | GENERIC.1020-1052
| | | GENERIC.1030-1052
| | | HISTORY
| | | TODO
| | |
| | +---1010
| | | avt.c
| | | avtreg.h
| | | README
| | |
| | +---1020
| | | avt.c
| | | avtreg.h
| | | README
| | |
| | +---1020-1052
| | | avt.c
| | | avtreg.h
| | |
| | +---1030-1052
| | | avt.c
| | | avtreg.h
| | |
| | +---2.2.2
| | | devices.i386.avt
| | | files.i386.avt
| | | INSTALL-2.2.2
| | | LINT.avt
| | | userconfig.c.diff
| | |
| | +---do-2.2.2
| | | devices.i386.avt
| | | files.i386.avt
| | | INSTALL
| | | LINT.avt
| | | userconfig.c.diff
| | |
| | +---ic
| | | i8237.h
| | | i8237.h.dist
| | |
| | \---isa
| | avt.c
| | avt.h
| | avtreg.h
| | isa.c
| | isa.c.dist
| | isa_device.h
| | isa_device.h.dist
| |
| +---03SEP97S.tar
| | | 03SEP97S.tar
| | |
| | \---03SEP97S
| | \---sys
| | \---i386
| | \---isa
| | | avt.c
| | | avtreg.h
| | |
| | \---arvid
| | | arvid20.doc
| | | avto10.doc
| | | avto20.doc
| | | avto31.doc
| | | GENERIC.1010
| | | GENERIC.1020
| | | GENERIC.1020-1052
| | | GENERIC.1030-1052
| | | HISTORY
| | | TODO
| | |
| | +---1010
| | | avt.c
| | | avtreg.h
| | | README
| | |
| | +---1020
| | | avt.c
| | | avtreg.h
| | | README
| | |
| | +---1020-1052
| | | avt.c
| | | avtreg.h
| | |
| | +---1030-1052
| | | avt.c
| | | avtreg.h
| | |
| | +---2.2.2
| | | devices.i386.avt
| | | files.i386.avt
| | | INSTALL-2.2.2
| | | LINT.avt
| | | userconfig.c.diff
| | |
| | +---do-2.2.2
| | | devices.i386.avt
| | | files.i386.avt
| | | INSTALL
| | | LINT.avt
| | | userconfig.c.diff
| | |
| | +---ic
| | | i8237.h
| | | i8237.h.dist
| | |
| | \---isa
| | avt.c
| | avt.h
| | avtreg.h
| | isa.c
| | isa.c.dist
| | isa_device.h
| | isa_device.h.dist
| |
| +---22JUN97P
| | \---packages
| | \---arvid
| | | arvidapi.h
| | | README
| | |
| | +---audio
| | | avread.c
| | | avread.old
| | | avwrite.c
| | | avwrite.old
| | | Makefile
| | | README
| | |
| | +---avcopier
| | | | avcopier.c
| | | | avreadtof.c
| | | | Makefile
| | | | README
| | | |
| | | +---c++
| | | | avreadtof.c
| | | | bin.inf
| | | | main.cpp
| | | | Makefile
| | | | ReadSector.cpp
| | | | ReadSector.hpp
| | | |
| | | \---test
| | | avreadtof.c
| | | bin.inf
| | | main
| | | main.cpp
| | | Makefile
| | | ReadSector.cpp
| | | ReadSector.hpp
| | | ReadSector.hpp.b
| | | test
| | | test.cpp
| | |
| | +---avinfo
| | | avinfo.c
| | | Makefile
| | | README
| | |
| | +---avphase
| | | avphase.c
| | | README
| | |
| | +---avread
| | | avtdr.c
| | |
| | +---avshell
| | | avshell.c
| | |
| | +---avtape
| | | Makefile
| | | tape.c
| | |
| | +---doc
| | | | arvid.cfg
| | | | arvid_f0.txt
| | | | avtfmt.txt
| | | | avtfmtmy.txt
| | | | README
| | | | tdrfmt.txt
| | | | vcrtab.txt
| | | |
| | | \---hard
| | | 1020.TXT
| | | 1031.TXT
| | | 1051.TXT
| | | 1052.TXT
| | |
| | +---include
| | | avt.tbl
| | | avt100.c
| | | avt100.o
| | | avtreg.h
| | | avt_rs.o
| | | crc.c
| | | crc.o
| | | errormes.h
| | | rsgen.h
| | | tdr.h
| | | vcr.hpp
| | |
| | +---raw
| | | aaa
| | | avread
| | | avread.c
| | | avread.o
| | | avreadrs.c
| | | avwrite.c
| | | Makefile
| | | raw.c
| | | raw_make
| | | README
| | |
| | +---sys
| | | 200-100as
| | | 200.c
| | | 200f1ab
| | | d100.c
| | | Makefile
| | | README
| | | readrsd.c
| | | RS
| | | rsc.c
| | | rsc.c.d
| | | rsd.c
| | |
| | +---tdr
| | | tdr_dir
| | | tdr_dir.c
| | | tdr_dir.c.b
| | | tdr_dir.c.d
| | |
| | \---vcr
| | | akair110.vcr
| | | IrcTrn
| | | IrcTrn.cpp
| | | make.IrcTrn
| | | Makefile
| | | vcread.c
| | | vcrload.c
| | | vcrwrite.c
| | | viewvcr.c
| | | viewvcr.cpp.old
| | |
| | \---asm
| | 17E4
| | 17E4.asm
| | 1BD3.asm
| | irctomod.asm
| |
| +---22JUN97P.tar
| | 22JUN97P.tar
| |
| +---22JUN97S
| | \---sys
| | \---i386
| | \---isa
| | | avt.c
| | | avtreg.h
| | |
| | \---arvid
| | | arvid20.doc
| | | avto10.doc
| | | avto20.doc
| | | avto31.doc
| | | GENERIC.1010
| | | GENERIC.1020
| | | GENERIC.1020-1052
| | | GENERIC.1030-1052
| | | HISTORY
| | | INSTALL
| | | TODO
| | |
| | +---1010
| | | avt.c
| | | avtreg.h
| | | README
| | |
| | +---1020
| | | avt.c
| | | avtreg.h
| | | README
| | |
| | +---1020-1052
| | | avt.c
| | | avtreg.h
| | |
| | +---1030-1052
| | | avt.c
| | | avtreg.h
| | |
| | +---ic
| | | i8237.h
| | | i8237.h.dist
| | |
| | \---isa
| | avt.c
| | avt.h
| | avtreg.h
| | isa.c
| | isa.c.dist
| | isa_device.h
| | isa_device.h.dist
| |
| +---22JUN97S.tar
| | 22JUN97S.tar
| |
| +---ad393tst
| | ARVID20.ARJ
| | ARVID32.ARJ
| | AVSHELL.CFG
| | COMMON.ARJ
| | DIRINFO
| | DOC-RUSS.ARJ
| | FILE_ID.DIZ
| | HLP-RUSS.ARJ
| | INSTALL.CFG
| | INSTALL.EXE
| | LNG-ENGL.ARJ
| | LNG-RUSS.ARJ
| | README.1ST
| | VCR-DATA.ARJ
| |
| +---ARVID1YS
| | | ARVID.BAT
| | | ARVID.CFG
| | | ARVID.MES
| | | ARVID31.EXE
| | | AV1-OS2.ICO
| | | AV2-OS2.ICO
| | | AV2-WIN.ICO
| | | AV3-OS2.ICO
| | | AV3-WIN.ICO
| | | AVBW.PAL
| | | AVCOLOR.PAL
| | | AVCOMSTR.BAT
| | | AVCONFIG.EXE
| | | AVCOPIER.EXE
| | | AVIRC.BAT
| | | AVIRC.EXE
| | | AVLOADER.EXE
| | | AVRECOVR.BAT
| | | AVRECOVR.HLP
| | | AVSETUP.BAT
| | | AVSETUP.HLP
| | | AVSHELL.BAT
| | | AVSHELL.CFG
| | | AVSHELL.EXE
| | | AVSHELL.HLP
| | | AVTEST31.EXE
| | | AVVCR.EXE
| | | AVVCR.HLP
| | | CONTENT.PRT
| | | DELDESCR.EXE
| | | DPMI16BI.OVL
| | | FUNA5000.VCR
| | | README.1ST
| | | RTM.EXE
| | | VCRFILES.DAT
| | | VCRNAMES.DAT
| | | VCT2VCR.EXE
| | | _AVCOMST.EXE
| | | _AVIRC.EXE
| | | _AVRECOV.EXE
| | | _AVSETUP.EXE
| | |
| | \---DOC
| | | ARVIDFAQ.TXT
| | | ARVIDPO.DOC
| | | AVCOMSTR.DOC
| | | AVCONFIG.DOC
| | | AVIRC.DOC
| | | AVRECOVR.DOC
| | | AVSETUP.DOC
| | | AVTEST.DOC
| | | AVTO10.DOC
| | | AVTO20.DOC
| | | AVTO31.DOC
| | | AVVCR.DOC
| | | CHANGES.VER
| | | DELDESCR.DOC
| | | LICENCE.DOC
| | | PALETTE.DOC
| | | README.DOC
| | | RECOMMND.DOC
| | | SCART.TXT
| | | TROUBLE.LST
| | | VCT2VCR.DOC
| | |
| | \---ADVANCED
| | CABLES.TXT
| | K1031-1.HP
| | K1031-2.HP
| | K1031.TXT
| | K1031API.TXT
| | TDRFMT.TXT
| |
| +---arvid20
| | \---arvid
| | AVARCH.EXE
| | AVARCH20.EXE
| | INSTALL.BAT
| | READ.ME
| |
| +---ARVID2YS
| | | ARVID.BAT
| | | ARVID.CFG
| | | ARVID.MES
| | | ARVID31.EXE
| | | AVBW.PAL
| | | AVCOLOR.PAL
| | | AVCOMSTR.BAT
| | | AVCONFIG.EXE
| | | AVCOPIER.EXE
| | | AVIRC.BAT
| | | AVLOADER.EXE
| | | AVRECOVR.BAT
| | | AVRECOVR.HLP
| | | AVSETUP.BAT
| | | AVSETUP.HLP
| | | AVSHELL.BAT
| | | AVSHELL.CFG
| | | AVSHELL.EXE
| | | AVSHELL.HLP
| | | AVTEST31.EXE
| | | AVVCR.EXE
| | | AVVCR.HLP
| | | DELDESCR.COM
| | | DPMI16BI.OVL
| | | FUNA5000.VCR
| | | README.1ST
| | | RTM.EXE
| | | VCRFILES.DAT
| | | VCRNAMES.DAT
| | | VCT2VCR.EXE
| | | _AVCOMST.EXE
| | | _AVIRC.EXE
| | | _AVRECOV.EXE
| | | _AVSETUP.EXE
| | |
| | \---DOC
| | ARVIDFAQ.TXT
| | ARVIDPO.DOC
| | AVCOMSTR.DOC
| | AVCONFIG.DOC
| | AVIRC.DOC
| | AVRECOVR.DOC
| | AVSETUP.DOC
| | AVTEST.DOC
| | AVTO10.DOC
| | AVTO20.DOC
| | AVTO31.DOC
| | AVVCR.DOC
| | CABLES.TXT
| | CHANGES.VER
| | DELDESCR.DOC
| | K1031.TXT
| | K1031_1.01P
| | K1031_2.01P
| | LICENCE.DOC
| | PALETTE.DOC
| | README.DOC
| | RECOMMND.DOC
| | TDRFMT.TXT
| | TROUBLE.LST
| | VCT2VCR.DOC
| |
| +---ARVID31
| | ARVID1.GIF
| | ARVID2.GIF
| | FILE_ID.DIZ
| |
| +---ARVID346
| | | ARVID10.ARJ
| | | ARVID20.ARJ
| | | ARVID31.ARJ
| | | ARVID_SA.TXT
| | | ARVID_TI.TXT
| | | AVSHELL.CFG
| | | COMMON.ARJ
| | | DIRINFO
| | | DOC-RUSS.ARJ
| | | FILE_ID.DIZ
| | | HLP-RUSS.ARJ
| | | INSTALL.CFG
| | | INSTALL.EXE
| | | INSTALL.PIF
| | | LNG-ENGL.ARJ
| | | LNG-RUSS.ARJ
| | | README.1ST
| | | REALMODE.ARJ
| | |
| | +---ARVID10
| | | ARVID10.EXE
| | | AVTEST10.EXE
| | |
| | +---ARVID20
| | | ARVID20.EXE
| | | AVTEST20.EXE
| | |
| | +---ARVID31
| | | ARVID31.EXE
| | | AVTEST31.EXE
| | |
| | +---COMMON
| | | AVBW.PAL
| | | AVCOLOR.PAL
| | | AVCONFIG.EXE
| | | AVCOPIER.EXE
| | | AVLOADER.EXE
| | | AVSHELL.EXE
| | | AVVCR.EXE
| | | DELDESCR.COM
| | | DPMI16BI.OVL
| | | RTM.EXE
| | | VCRFILES.DAT
| | | VCRNAMES.DAT
| | | VCT2VCR.EXE
| | | _AVCOMST.EXE
| | | _AVIRC.EXE
| | | _AVRECOV.EXE
| | | _AVSETUP.EXE
| | |
| | +---DOC-RUSS
| | | | ARVIDFAQ.TXT
| | | | ARVIDPO.DOC
| | | | AVCOMSTR.DOC
| | | | AVCONFIG.DOC
| | | | AVIRC.DOC
| | | | AVRECOVR.DOC
| | | | AVSETUP.DOC
| | | | AVTEST.DOC
| | | | AVTO10.DOC
| | | | AVTO20.DOC
| | | | AVTO31.DOC
| | | | AVVCR.DOC
| | | | CHANGES.VER
| | | | DELDESCR.DOC
| | | | LICENCE.DOC
| | | | PALETTE.DOC
| | | | README.DOC
| | | | RECOMMND.DOC
| | | | TROUBLE.LST
| | | | VCT2VCR.DOC
| | | |
| | | \---ADVANCED.DOC
| | | CABLES.TXT
| | | K1031.TXT
| | | K1031_1.01P
| | | K1031_2.01P
| | | TDRFMT.TXT
| | |
| | +---HLP-RUSS
| | | AVRECOVR.HLP
| | | AVSETUP.HLP
| | | AVSHELL.HLP
| | | AVVCR.HLP
| | |
| | +---LNG-ENGL
| | | ARVID.MES
| | |
| | +---LNG-RUSS
| | | ARVID.MES
| | |
| | \---REALMODE
| | AVSHELLR.EXE
| | _AVCOMSR.EXE
| |
| +---ARVID52
| | +---D1
| | | | ARV_1052.ARJ
| | | |
| | | \---ARV_1052
| | | ARVID.TXT
| | | ARVIDFAQ.ZIP
| | | ARWIN111.ZIP
| | |
| | \---D2
| | ARV_1052.A01
| |
| +---ARVIDFAQ
| | ARVIDERR.TXT
| | ARVIDFAQ.TXT
| |
| +---arvid_dos_v346r5
| | ARVID10.ARJ
| | ARVID20.ARJ
| | ARVID31.ARJ
| | AVSHELL.CFG
| | COMMON.ARJ
| | DIRINFO
| | DOC-RUSS.ARJ
| | FILE_ID.DIZ
| | HLP-RUSS.ARJ
| | INSTALL.CFG
| | INSTALL.EXE
| | LNG-ENGL.ARJ
| | LNG-RUSS.ARJ
| | README.1ST
| |
| +---ARVLIN00
| | ARVLIN00.tar
| |
| +---arwin015
| | ARVID.INF
| | AVINSTAL.EXE
| | CHANGES.VER
| | DATA.1
| | DATA.2
| | DISK1.ID
| | DISK2.ID
| | README.TXT
| | SETUP.INS
| | SETUP.PKG
| | _INST32I.EX_
| | _ISDEL.EXE
| | _SETUP.DLL
| | _SETUP.LIB
| |
| +---arwin018
| | ARVID.INF
| | AVINSTAL.EXE
| | CHANGES.VER
| | DATA.1
| | DATA.2
| | DISK1.ID
| | DISK2.ID
| | README.TXT
| | SETUP.INS
| | SETUP.PKG
| | _INST32I.EX_
| | _ISDEL.EXE
| | _SETUP.DLL
| | _SETUP.LIB
| |
| +---ARWIN110
| | ARVID.INF
| | AVINSTAL.EXE
| | DATA.1
| | DATA.2
| | DISK1.ID
| | DISK2.ID
| | README.TXT
| | SETUP.INS
| | SETUP.PKG
| | _INST32I.EX_
| | _ISDEL.EXE
| | _SETUP.DLL
| | _SETUP.LIB
| |
| +---arwincom
| | +---DISK1
| | | AVINSTAL.EXE
| | | DISK1.ID
| | | _INST32I.EX_
| | | _ISDEL.EXE
| | | _SETUP.DLL
| | | _SETUP.LIB
| | |
| | \---DISK2
| | DATA.2
| | DISK2.ID
| |
| +---av-vcr
| | \---DISK1
| | VCRFILES.DAT
| | VCRLIST.TXT
| | VCRNAMES.DAT
| |
| +---av2rx096
| | | FILE_ID.DIZ
| | | READ.ME
| | |
| | +---AVT
| | +---BIN
| | | AVTAPER.CMD
| | | RXAVMSG.CMD
| | | RXAVSTAT.CMD
| | | TDR2AVT.EXE
| | |
| | +---DLL
| | | AVDAPI.DLL
| | | AVREXX.DLL
| | | OS2WAUX.DLL
| | | TDRCONV.DLL
| | | VROBJ.DLL
| | | VXAVRES.DLL
| | |
| | +---H
| | | ARVIDAPI.H
| | |
| | +---HELP
| | | AVAPIDES.TXT
| | | AVREXX.INF
| | | VXARVID.HLP
| | | VXARVID.INF
| | |
| | +---LIB
| | | AVDAPI.LIB
| | |
| | +---SYS
| | | ARVID32.SYS
| | | MWDD32.SYS
| | |
| | \---VXARVID
| | RXAVMSG.CMD
| | RXAVSTAT.CMD
| | TAPSAVER.VRX
| | VXARVID.EXE
| |
| +---av346r5
| | | ARVID10.ARJ
| | | ARVID20.ARJ
| | | ARVID31.ARJ
| | | AVSHELL.CFG
| | | COMMON.ARJ
| | | DIRINFO
| | | DOC-RUSS.ARJ
| | | FILE_ID.DIZ
| | | HLP-RUSS.ARJ
| | | INSTALL.CFG
| | | INSTALL.EXE
| | | LNG-ENGL.ARJ
| | | LNG-RUSS.ARJ
| | | README.1ST
| | |
| | \---AV-INFO
| | ARVID_!!.TXT
| | ARVID_EX.TXT
| | ARVID_SA.TXT
| | ARVID_TI.TXT
| | NEED.TXT
| |
| +---AVCTRL09
| | AV_CTRL.CFG
| | AV_CTRL.DOC
| | AV_CTRL.EXE
| | AV_SHOW.EXE
| | CHOICE.COM
| | COMMENT
| | DESCRIPT.ION
| | DISCLAIM.ERS
| | DPMI16BI.OVL
| | EXAMPLE.BAT
| | FF.BAT
| | FILE_ID.DIZ
| | HTTP.WWW
| | ORT_LOGO.PTN
| | PLAY.BAT
| | RECORD.BAT
| | REW.BAT
| | RTM.EXE
| | RTR_LOGO.PTN
| | STOP.BAT
| | WHATSNEW
| |
| +---AVTUT10
| | AVT2FL.EXE
| | AVT2FL2.EXE
| | AVTDIR.EXE
| | AVTDIR2.EXE
| | DPMI16BI.OVL
| | RTM.EXE
| | SAMPLE.INI
| |
| +---AVTUT11
| | AVT2FL.EXE
| | AVT2FL2.EXE
| | AVTDIR.EXE
| | AVTDIR2.EXE
| | DPMI16BI.OVL
| | FILE_ID.DIZ
| | HISTORY
| | READ.ME
| | RTM.EXE
| | SAMPLE.INI
| |
| +---AVTUT12
| | AVT2FL.EXE
| | AVT2FL2.EXE
| | AVTDIR.EXE
| | AVTDIR2.EXE
| | DPMI16BI.OVL
| | FILE_ID.DIZ
| | HISTORY
| | READ.ME
| | RTM.EXE
| | SAMPLE.INI
| |
| +---av_sales
| | AV_SALES.TXT
| |
| +---av_tech
| | AV_TECH.TXT
| |
| +---AW120016
| | | README.1ST
| | |
| | \---DISK1
| | ARVID.INF
| | CHANGES.VER
| | DATA.1
| | README.TXT
| | SETUP.INS
| | SETUP.PKG
| |
| +---AW120017
| | | README.1ST
| | |
| | \---DISK1
| | ARVID.INF
| | CHANGES.VER
| | DATA.1
| | README.TXT
| | SETUP.INS
| | SETUP.PKG
| |
| +---DISK1
| | ARVID.INF
| | AVINSTAL.EXE
| | CHANGES.VER
| | DATA.1
| | DISK1.ID
| | README.TXT
| | SETUP.INS
| | SETUP.PKG
| | _INST32I.EX_
| | _ISDEL.EXE
| | _SETUP.DLL
| | _SETUP.LIB
| |
| +---DISK2
| | | ARVID.TXT
| | | ARVIDFAQ.ZIP
| | | ARV_1052.A01
| | | AVAUD09K.ZIP
| | | COVER_B.DOC
| | | COVER_F.DOC
| | | MANUAL.DOC
| | |
| | +---ARVIDFAQ
| | | PART1.FAQ
| | | PART2.FAQ
| | | PART3.FAQ
| | | PART4.FAQ
| | |
| | \---AVAUD09K
| | AVAUDIO.CFG
| | AVAUDIO.DOC
| | AVA_DPMI.ZIP
| | AVPSBP.EXE
| | AVRSBP.EXE
| | AVRSBR.EXE
| | CD2AV.EXE
| | COMMENT
| | DESCRIPT.ION
| | DISCLAIM.ERS
| | ENGLISH.DOC
| | FILE_ID.DIZ
| | HTTP.WWW
| | TECHNOTE.TXT
| | WHATSNEW
| |
| +---DISK3
| | | ARVID10.ARJ
| | | ARVID20.ARJ
| | | ARVID31.ARJ
| | | AVSHELL.CFG
| | | COMMON.ARJ
| | | DIRINFO
| | | DOC-RUSS.ARJ
| | | FILE_ID.DIZ
| | | HLP-RUSS.ARJ
| | | INSTALL.CFG
| | | INSTALL.EXE
| | | LNG-ENGL.ARJ
| | | LNG-RUSS.ARJ
| | | README.1ST
| | |
| | +---ARVID10
| | | ARVID10.EXE
| | | AVTEST10.EXE
| | |
| | +---ARVID20
| | | ARVID20.EXE
| | | AVTEST20.EXE
| | |
| | +---ARVID31
| | | ARVID31.EXE
| | | AVTEST31.EXE
| | |
| | +---COMMON
| | | AV1-OS2.ICO
| | | AV2-OS2.ICO
| | | AV2-WIN.ICO
| | | AV3-OS2.ICO
| | | AV3-WIN.ICO
| | | AVBW.PAL
| | | AVCOLOR.PAL
| | | AVCONFIG.EXE
| | | AVCOPIER.EXE
| | | AVIRC.EXE
| | | AVLOADER.EXE
| | | AVSHELL.EXE
| | | AVVCR.EXE
| | | DELDESCR.EXE
| | | DPMI16BI.OVL
| | | RTM.EXE
| | | VCRFILES.DAT
| | | VCRNAMES.DAT
| | | VCT2VCR.EXE
| | | _AVCOMST.EXE
| | | _AVIRC.EXE
| | | _AVRECOV.EXE
| | | _AVSETUP.EXE
| | |
| | +---DOC-RUSS
| | | | ARVIDFAQ.TXT
| | | | ARVIDPO.DOC
| | | | AVCOMSTR.DOC
| | | | AVCONFIG.DOC
| | | | AVIRC.DOC
| | | | AVRECOVR.DOC
| | | | AVSETUP.DOC
| | | | AVTEST.DOC
| | | | AVTO10.DOC
| | | | AVTO20.DOC
| | | | AVTO31.DOC
| | | | AVVCR.DOC
| | | | CHANGES.VER
| | | | DELDESCR.DOC
| | | | LICENCE.DOC
| | | | PALETTE.DOC
| | | | README.DOC
| | | | RECOMMND.DOC
| | | | SCART.TXT
| | | | TROUBLE.LST
| | | | VCT2VCR.DOC
| | | |
| | | \---ADVANCED
| | | CABLES.TXT
| | | K1031-1.HP
| | | K1031-2.HP
| | | K1031.TXT
| | | K1031API.TXT
| | | TDRFMT.TXT
| | |
| | +---HLP-RUSS
| | | AVRECOVR.HLP
| | | AVSETUP.HLP
| | | AVSHELL.HLP
| | | AVVCR.HLP
| | |
| | +---LNG-ENGL
| | | ARVID.MES
| | |
| | \---LNG-RUSS
| | ARVID.MES
| |
| +---DOC
| | ARVIDFAQ.TXT
| | ARVIDPO.DOC
| | AVCOMSTR.DOC
| | AVCONFIG.DOC
| | AVIRC.DOC
| | AVRECOVR.DOC
| | AVSETUP.DOC
| | AVTEST.DOC
| | AVTO10.DOC
| | AVTO20.DOC
| | AVTO31.DOC
| | AVVCR.DOC
| | CABLES.TXT
| | CHANGES.VER
| | DELDESCR.DOC
| | K1031.TXT
| | K1031_1.01P
| | K1031_2.01P
| | LICENCE.DOC
| | PALETTE.DOC
| | README.DOC
| | RECOMMND.DOC
| | TDRFMT.TXT
| | TROUBLE.LST
| | VCT2VCR.DOC
| |
| +---DOWNLOAD
| | 03SEP97P.TGZ
| | 03SEP97S.TGZ
| | 1031DESC.TXT
| | 1051DESC.TXT
| | 1052DESC.TXT
| | 22JUN97P.TGZ
| | 22JUN97S.TGZ
| | ad393tst.arj
| | AD393TST.ZIP
| | ARVID.TXT
| | ARVID1.GIF
| | ARVID2.GIF
| | arvid20.zip
| | ARVID31.RAR
| | arvidfaq.arj.part
| | ARVIDFAQ.ZIP
| | Arvidpo.htm
| | arvidpo.zip
| | Arvidto.htm
| | arvidto.zip
| | ARVID_I.RAR
| | ARVLIN00.TGZ
| | ARWIN018.ZIP
| | arwincom.arj
| | ARWINCOM.ZIP
| | av-vcr.arj
| | av2rx096.rar
| | av346r5.arj
| | AVARCH.EXE
| | AVARCH20.EXE
| | Avcomstr.htm
| | avcomstr.zip
| | AVCTRL09.ZIP
| | avdraw.arj.part
| | Avsetup.htm
| | avsetup.zip
| | Avtest.htm
| | avtest.zip
| | AVTUT10.ZIP
| | AVTUT11.ZIP
| | AVTUT12.ZIP
| | Avvct.htm
| | avvct.zip
| | av_sales.arj
| | av_tech.arj
| | aw120017.arj.part
| | DESCRIPT.ION
| | files-2.bbs
| | FILE_ID.DIZ
| | INSTALL.BAT
| | IRC10.ZIP
| | PAFTDR11.ZIP
| | READ.ME
| | Recommnd.htm
| | recommnd.zip
| | Trouble.htm
| | trouble.zip
| |
| +---inet_arvid
| | 30MIN.WAV
| | arvid.htm
| | av1031.jpg
| | av1051.jpg
| | av1052.jpg
| | B5.BMP
| | B51.BMP
| | CLOCKS.EXE
| | clocks.ini
| | HOUR.WAV
| | raid.htm
| | raid1.htm
| | raid181.jpg
| | raid182.jpg
| | raid183.jpg
| | raid184.jpg
| | raid185.jpg
| | raid2.htm
| | raid3.htm
| | raid4.htm
| | raid5.htm
| | raid_1.gif
| | raid_2.gif
| | raid_3.gif
| | raid_4.gif
| | raid_5.gif
| |
| +---IRC10
| | IRC.BAT
| | IRC.CFG
| | MAKE_IRC.EXE
| | MAKE_IRC.PAS
| | READ.ME
| |
| +---PAFTDR11
| | D2TDR13.ZIP
| | English.hlf
| | English.lng
| | File_id.diz
| | PAFTDR.dll
| | Readme English.txt
| | Readme Russian.txt
| | Russian.hlf
| | Russian.lng
| | TDRSHL40.ZIP
| | WhatsNew.txt
| |
| \---soft
| +---D1
| | ARWIN110.EXE
| |
| +---D2
| | ARVID346.EXE
| | ARWIN110.R00
| |
| \---D3
| ARVID346.R00
|
\---?????-from-mazalov1972
\---?????
+---D1 (MS DOS)
| | ARVID20.ARJ
| | ARVID32.ARJ
| | ARVID_SA.TXT
| | AVSHELL.CFG
| | COMMON.ARJ
| | DIRINFO
| | DOC-RUSS.ARJ
| | FILE_ID.DIZ
| | HLP-RUSS.ARJ
| | INSTALL.CFG
| | INSTALL.EXE
| | LNG-ENGL.ARJ
| | LNG-RUSS.ARJ
| | README.1ST
| | VCR-DATA.ARJ
| |
| +---ADDENDUM
| | I430IORT.ZIP
| | RAWDISK.ZIP
| | TRITON2.ZIP
| |
| +---ARVID20
| | ARVID20.EXE
| | AVTEST20.EXE
| |
| +---ARVID32
| | ARVID32.EXE
| | AVTEST32.EXE
| |
| +---COMMON
| | ANSI2OEM.COD
| | AV1-OS2.ICO
| | AV2-OS2.ICO
| | AV2-WIN.ICO
| | AV3-OS2.ICO
| | AV3-WIN.ICO
| | AVBW.PAL
| | AVCOLOR.PAL
| | AVCONFIG.EXE
| | AVCOPIER.EXE
| | AVLOADER.EXE
| | AVSHELL.EXE
| | AVVCR.EXE
| | DELDESCR.EXE
| | DPMI16BI.OVL
| | RTM.EXE
| | VCT2VCR.EXE
| | _AVCOMSX.EXE
| | _AVIRC.EXE
| | _AVRECOV.EXE
| | _AVSETUP.EXE
| |
| +---DOC-RUSS
| | | ARVIDPO.DOC
| | | AVCOMSTR.DOC
| | | AVCONFIG.DOC
| | | AVIRC.DOC
| | | AVRECOVR.DOC
| | | AVSETUP.DOC
| | | AVTEST.DOC
| | | AVTO10.DOC
| | | AVTO20.DOC
| | | AVTO31.DOC
| | | AVVCR.DOC
| | | CHANGES.VER
| | | DELDESCR.DOC
| | | LICENCE.DOC
| | | PALETTE.DOC
| | | README.DOC
| | | RECOMMND.DOC
| | | TROUBLE.LST
| | | VCT2VCR.DOC
| | |
| | \---ADVANCED
| | 1031DESC.TXT
| | 1051DESC.TXT
| | 1052DESC.TXT
| | AVTFMT.TXT
| | CABLES.TXT
| | HINTS.TXT
| | K1031.TXT
| | K1031_1.01P
| | K1031_2.01P
| | K1052.TXT
| | K1052_1.01P
| | K1052_2.01P
| | SCART.TXT
| | TDRFMT.TXT
| |
| +---HLP-RUSS
| | AVRECOVR.HLP
| | AVSETUP.HLP
| | AVSHELL.HLP
| | AVVCR.HLP
| |
| +---LNG-ENGL
| | ARVID.MES
| |
| +---LNG-RUSS
| | ARVID.MES
| |
| \---VCR-DATA
| VCRFILES.DAT
| VCRNAMES.DAT
|
+---D1 (WIN 95)
| ARVID.INF
| AVINSTAL.EXE
| CHANGES.VER
| DATA.1
| DISK1.ID
| README.TXT
| SETUP.INS
| SETUP.PKG
| _INST32I.EX_
| _ISDEL.EXE
| _SETUP.DLL
| _SETUP.LIB
|
+---D2 (WIN 95)
| | DATA.2
| | DISK2.ID
| |
| \---ADDENDUM
| | ARVIDFAQ.ZIP
| | AVDRAW09.ZIP
| | D2TDR11.ZIP
| | SYNCTAP2.ZIP
| | TDRACE12.ZIP
| | TDRSHL40.ZIP
| | VARVID1B.ZIP
| | VCRNAME.ZIP
| |
| +---ARVIDFAQ
| | ARVIDERR.TXT
| | ARVIDFAQ.TXT
| |
| +---AVDRAW09
| | AVDRAW.CFG
| | AVDRAW.DOC
| | AVDRAW.EXE
| | COMMENT
| | DESCRIPT.ION
| | DISCLAIM.ERS
| | FILE_ID.DIZ
| | HTTP.WWW
| | TST_DRAW.TXT
| |
| +---D2TDR11
| | DIR2TDR.DOC
| | DIR2TDR.EXE
| | FILE_ID.DIZ
| |
| +---SYNCTAP2
| | DEXCL
| | README
| | SYNC.BAT
| | SYNCTAPE.EXE
| |
| +---TDRACE12
| | FILE_ID.DIZ
| | INSTALL.EXE
| | TA.DOC
| | TA.EXE
| |
| +---TDRSHL40
| | FILE_ID.DIZ
| | TDR.EXE
| | TDRSHELL.DOC
| | WHATSNEW
| |
| +---VARVID1B
| | ARVID.INF
| | ARVIDW95.DOC
| | FILE_ID.DIZ
| | REGFORM.TXT
| | VARVID.386
| | VARVID.REG
| | VARVID.TXT
| |
| \---VCRNAME
| README
| VCR.C
| VCR.EXE
|
+---? ???????.??
| \---ARVID1052
| | 03SEP97P.TGZ
| | 03SEP97S.TGZ
| | 1031DESC.TXT
| | 1051DESC.TXT
| | 1052DESC.TXT
| | 22JUN97P.TGZ
| | 22JUN97S.TGZ
| | ad393tst.arj
| | AD393TST.ZIP
| | ARVID.TXT
| | arvid20.zip
| | ARVID31.RAR
| | ARVIDFAQ.ZIP
| | Arvidpo.htm
| | arvid_dos_v346r5.rar
| | ARVLIN00.TGZ
| | arwin015.rar
| | ARWIN018.ZIP
| | arwincom.arj
| | av-vcr.arj
| | av2rx096.rar
| | av346r5.arj
| | AVARCH.EXE
| | AVARCH20.EXE
| | Avcomstr.htm
| | AVCTRL09.ZIP
| | Avsetup.htm
| | Avtest.htm
| | AVTUT10.ZIP
| | AVTUT11.ZIP
| | AVTUT12.ZIP
| | Avvct.htm
| | av_sales.arj
| | av_tech.arj
| | AW120016.ZIP
| | AW120017.ZIP
| | descript.ion
| | DOWNLOAD.rar
| | dsk3-1.exe
| | dsk3-2.exe
| | dsk3-3.exe
| | dsk3-4.exe
| | files-2.bbs
| | inet_arvid.zip
| | INSTALL.BAT
| | IRC10.ZIP
| | PAFTDR11.ZIP
| | READ.ME
| | Recommnd.htm
| | Trouble.htm
| | ????????? ?????. ? ???????? ????? - ?????? - ???????? ???????? ????????.pdf
| | ??????????.pdf
| |
| +---ARVID1YS
| | | ARVID.BAT
| | | ARVID.CFG
| | | ARVID.MES
| | | ARVID31.EXE
| | | AV1-OS2.ICO
| | | AV2-OS2.ICO
| | | AV2-WIN.ICO
| | | AV3-OS2.ICO
| | | AV3-WIN.ICO
| | | AVBW.PAL
| | | AVCOLOR.PAL
| | | AVCOMSTR.BAT
| | | AVCONFIG.EXE
| | | AVCOPIER.EXE
| | | AVIRC.BAT
| | | AVIRC.EXE
| | | AVLOADER.EXE
| | | AVRECOVR.BAT
| | | AVRECOVR.HLP
| | | AVSETUP.BAT
| | | AVSETUP.HLP
| | | AVSHELL.BAT
| | | AVSHELL.CFG
| | | AVSHELL.EXE
| | | AVSHELL.HLP
| | | AVTEST31.EXE
| | | AVVCR.EXE
| | | AVVCR.HLP
| | | CONTENT.PRT
| | | DELDESCR.EXE
| | | DPMI16BI.OVL
| | | FUNA5000.VCR
| | | README.1ST
| | | RTM.EXE
| | | VCRFILES.DAT
| | | VCRNAMES.DAT
| | | VCT2VCR.EXE
| | | _AVCOMST.EXE
| | | _AVIRC.EXE
| | | _AVRECOV.EXE
| | | _AVSETUP.EXE
| | |
| | \---DOC
| | | ARVIDFAQ.TXT
| | | ARVIDPO.DOC
| | | AVCOMSTR.DOC
| | | AVCONFIG.DOC
| | | AVIRC.DOC
| | | AVRECOVR.DOC
| | | AVSETUP.DOC
| | | AVTEST.DOC
| | | AVTO10.DOC
| | | AVTO20.DOC
| | | AVTO31.DOC
| | | AVVCR.DOC
| | | CHANGES.VER
| | | DELDESCR.DOC
| | | LICENCE.DOC
| | | PALETTE.DOC
| | | README.DOC
| | | RECOMMND.DOC
| | | SCART.TXT
| | | TROUBLE.LST
| | | VCT2VCR.DOC
| | |
| | \---ADVANCED
| | CABLES.TXT
| | K1031-1.HP
| | K1031-2.HP
| | K1031.TXT
| | K1031API.TXT
| | TDRFMT.TXT
| |
| +---ARVID2YS
| | | ARVID.BAT
| | | ARVID.CFG
| | | ARVID.MES
| | | ARVID31.EXE
| | | AVBW.PAL
| | | AVCOLOR.PAL
| | | AVCOMSTR.BAT
| | | AVCONFIG.EXE
| | | AVCOPIER.EXE
| | | AVIRC.BAT
| | | AVLOADER.EXE
| | | AVRECOVR.BAT
| | | AVRECOVR.HLP
| | | AVSETUP.BAT
| | | AVSETUP.HLP
| | | AVSHELL.BAT
| | | AVSHELL.CFG
| | | AVSHELL.EXE
| | | AVSHELL.HLP
| | | AVTEST31.EXE
| | | AVVCR.EXE
| | | AVVCR.HLP
| | | DELDESCR.COM
| | | DPMI16BI.OVL
| | | FUNA5000.VCR
| | | README.1ST
| | | RTM.EXE
| | | VCRFILES.DAT
| | | VCRNAMES.DAT
| | | VCT2VCR.EXE
| | | _AVCOMST.EXE
| | | _AVIRC.EXE
| | | _AVRECOV.EXE
| | | _AVSETUP.EXE
| | |
| | \---DOC
| | ARVIDFAQ.TXT
| | ARVIDPO.DOC
| | AVCOMSTR.DOC
| | AVCONFIG.DOC
| | AVIRC.DOC
| | AVRECOVR.DOC
| | AVSETUP.DOC
| | AVTEST.DOC
| | AVTO10.DOC
| | AVTO20.DOC
| | AVTO31.DOC
| | AVVCR.DOC
| | CABLES.TXT
| | CHANGES.VER
| | DELDESCR.DOC
| | K1031.TXT
| | K1031_1.01P
| | K1031_2.01P
| | LICENCE.DOC
| | PALETTE.DOC
| | README.DOC
| | RECOMMND.DOC
| | TDRFMT.TXT
| | TROUBLE.LST
| | VCT2VCR.DOC
| |
| +---ARVID346
| | ARVID10.ARJ
| | ARVID20.ARJ
| | ARVID31.ARJ
| | ARVID_SA.TXT
| | ARVID_TI.TXT
| | AVSHELL.CFG
| | COMMON.ARJ
| | DIRINFO
| | DOC-RUSS.ARJ
| | FILE_ID.DIZ
| | HLP-RUSS.ARJ
| | INSTALL.CFG
| | INSTALL.EXE
| | INSTALL.PIF
| | LNG-ENGL.ARJ
| | LNG-RUSS.ARJ
| | README.1ST
| | REALMODE.ARJ
| |
| +---ARVID52
| | +---D1
| | | ARV_1052.ARJ
| | |
| | \---D2
| | ARV_1052.A01
| |
| +---arwin018
| | ARVID.INF
| | AVINSTAL.EXE
| | CHANGES.VER
| | DATA.1
| | DATA.2
| | DISK1.ID
| | DISK2.ID
| | README.TXT
| | SETUP.INS
| | SETUP.PKG
| | _INST32I.EX_
| | _ISDEL.EXE
| | _SETUP.DLL
| | _SETUP.LIB
| |
| +---ARWIN110
| | ARVID.INF
| | AVINSTAL.EXE
| | DATA.1
| | DATA.2
| | DISK1.ID
| | DISK2.ID
| | README.TXT
| | SETUP.INS
| | SETUP.PKG
| | _INST32I.EX_
| | _ISDEL.EXE
| | _SETUP.DLL
| | _SETUP.LIB
| |
| +---DISK1
| | ARVID.INF
| | AVINSTAL.EXE
| | CHANGES.VER
| | DATA.1
| | DISK1.ID
| | README.TXT
| | SETUP.INS
| | SETUP.PKG
| | _INST32I.EX_
| | _ISDEL.EXE
| | _SETUP.DLL
| | _SETUP.LIB
| |
| +---DISK2
| | ARVID.TXT
| | ARVIDFAQ.ZIP
| | ARV_1052.A01
| | AVAUD09K.ZIP
| | COVER_B.DOC
| | COVER_F.DOC
| | MANUAL.DOC
| |
| +---DISK3
| | ARVID10.ARJ
| | ARVID20.ARJ
| | ARVID31.ARJ
| | AVSHELL.CFG
| | COMMON.ARJ
| | DIRINFO
| | DOC-RUSS.ARJ
| | FILE_ID.DIZ
| | HLP-RUSS.ARJ
| | INSTALL.CFG
| | INSTALL.EXE
| | LNG-ENGL.ARJ
| | LNG-RUSS.ARJ
| | README.1ST
| |
| +---DOC
| | ARVIDFAQ.TXT
| | ARVIDPO.DOC
| | AVCOMSTR.DOC
| | AVCONFIG.DOC
| | AVIRC.DOC
| | AVRECOVR.DOC
| | AVSETUP.DOC
| | AVTEST.DOC
| | AVTO10.DOC
| | AVTO20.DOC
| | AVTO31.DOC
| | AVVCR.DOC
| | CABLES.TXT
| | CHANGES.VER
| | DELDESCR.DOC
| | K1031.TXT
| | K1031_1.01P
| | K1031_2.01P
| | LICENCE.DOC
| | PALETTE.DOC
| | README.DOC
| | RECOMMND.DOC
| | TDRFMT.TXT
| | TROUBLE.LST
| | VCT2VCR.DOC
| |
| \---soft
| +---D1
| | ARWIN110.EXE
| |
| +---D2
| | ARVID346.EXE
| | ARWIN110.R00
| |
| \---D3
| ARVID346.R00
|
\---? ???
+---DOS
| | ARVID20.ARJ
| | ARVID32.ARJ
| | ARVID_SA.TXT
| | AVSHELL.CFG
| | COMMON.ARJ
| | DIRINFO
| | DOC-RUSS.ARJ
| | FILE_ID.DIZ
| | HLP-RUSS.ARJ
| | INSTALL.CFG
| | INSTALL.EXE
| | LNG-ENGL.ARJ
| | LNG-RUSS.ARJ
| | README.1ST
| | VCR-DATA.ARJ
| |
| +---ADDENDUM
| | I430IORT.ZIP
| | RAWDISK.ZIP
| | TRITON2.ZIP
| |
| +---ARVID20
| | ARVID20.EXE
| | AVTEST20.EXE
| |
| +---ARVID32
| | ARVID32.EXE
| | AVTEST32.EXE
| |
| +---COMMON
| | ANSI2OEM.COD
| | AV1-OS2.ICO
| | AV2-OS2.ICO
| | AV2-WIN.ICO
| | AV3-OS2.ICO
| | AV3-WIN.ICO
| | AVBW.PAL
| | AVCOLOR.PAL
| | AVCONFIG.EXE
| | AVCOPIER.EXE
| | AVLOADER.EXE
| | AVSHELL.EXE
| | AVVCR.EXE
| | DELDESCR.EXE
| | DPMI16BI.OVL
| | RTM.EXE
| | VCT2VCR.EXE
| | _AVCOMSX.EXE
| | _AVIRC.EXE
| | _AVRECOV.EXE
| | _AVSETUP.EXE
| |
| +---DOC-RUSS
| | | ARVIDPO.DOC
| | | AVCOMSTR.DOC
| | | AVCONFIG.DOC
| | | AVIRC.DOC
| | | AVRECOVR.DOC
| | | AVSETUP.DOC
| | | AVTEST.DOC
| | | AVTO10.DOC
| | | AVTO20.DOC
| | | AVTO31.DOC
| | | AVVCR.DOC
| | | CHANGES.VER
| | | DELDESCR.DOC
| | | LICENCE.DOC
| | | PALETTE.DOC
| | | README.DOC
| | | RECOMMND.DOC
| | | TROUBLE.LST
| | | VCT2VCR.DOC
| | |
| | \---ADVANCED
| | 1031DESC.TXT
| | 1051DESC.TXT
| | 1052DESC.TXT
| | AVTFMT.TXT
| | CABLES.TXT
| | HINTS.TXT
| | K1031.TXT
| | K1031_1.01P
| | K1031_2.01P
| | K1052.TXT
| | K1052_1.01P
| | K1052_2.01P
| | SCART.TXT
| | TDRFMT.TXT
| |
| +---HLP-RUSS
| | AVRECOVR.HLP
| | AVSETUP.HLP
| | AVSHELL.HLP
| | AVVCR.HLP
| |
| +---LNG-ENGL
| | ARVID.MES
| |
| +---LNG-RUSS
| | ARVID.MES
| |
| \---VCR-DATA
| VCRFILES.DAT
| VCRNAMES.DAT
|
\---WIN95
+---DISK1
| ARVID.INF
| AVINSTAL.EXE
| CHANGES.VER
| DATA.1
| DISK1.ID
| README.TXT
| SETUP.INS
| SETUP.PKG
| _INST32I.EX_
| _ISDEL.EXE
| _SETUP.DLL
| _SETUP.LIB
|
\---DISK2
| DATA.2
| DISK2.ID
|
\---ADDENDUM
| ARVIDFAQ.ZIP
| AVDRAW09.ZIP
| D2TDR11.ZIP
| SYNCTAP2.ZIP
| TDRACE12.ZIP
| TDRSHL40.ZIP
| VARVID1B.ZIP
| VCRNAME.ZIP
|
+---ARVIDFAQ
| ARVIDERR.TXT
| ARVIDFAQ.TXT
|
+---AVDRAW09
| AVDRAW.CFG
| AVDRAW.DOC
| AVDRAW.EXE
| COMMENT
| DESCRIPT.ION
| DISCLAIM.ERS
| FILE_ID.DIZ
| HTTP.WWW
| TST_DRAW.TXT
|
+---D2TDR11
| DIR2TDR.DOC
| DIR2TDR.EXE
| FILE_ID.DIZ
|
+---SYNCTAP2
| DEXCL
| README
| SYNC.BAT
| SYNCTAPE.EXE
|
+---TDRACE12
| FILE_ID.DIZ
| INSTALL.EXE
| TA.DOC
| TA.EXE
|
+---TDRSHL40
| FILE_ID.DIZ
| TDR.EXE
| TDRSHELL.DOC
| WHATSNEW
|
+---VARVID1B
| ARVID.INF
| ARVIDW95.DOC
| FILE_ID.DIZ
| REGFORM.TXT
| VARVID.386
| VARVID.REG
| VARVID.TXT
|
\---VCRNAME
README
VCR.C
VCR.EXE
Endgame
In the summer of 1998 PO KSI stopped producing the ArVid.
Later that year, an article in the Russian computer journal “Computerra”🇷🇺 claimed that ArVid dropped in popularity because HDD storage and CD-R drives became cheaper. That article’s author, Andrei Fatkullin, pointed out that ArVid never achieved an “economy of scale”. It was always priced at around $80 USD when the alternatives steadily got cheaper. (As an example, the latest ArVid cost $79 in 1994🇷🇺 and $90 in 1997🇷🇺 while still doing the same fundamental “job”.)
I think Fatkullin is correct about the cause of ArVid’s death. From my vantage point in 2023 I can see that storage costs have been declining predictably – today $82 USD gets you a 2 Terabyte solid-state hard drive. Heck, for $8 USD you can get 128 GB of storage on a USB Stick. This doesn’t leave any space for a clunky data storage on VHS for $80…
A person who could’ve predicted this decline in price would see that a product in this space has a “built-in retirement date”. VHS always had an upper limit on capacity: PO KSI claimed it was 3.34GB for a 3-hour tape. The last ArVid device hit that ceiling at 325 Kbytes/sec. Using VHS tapes and unreliable domestic VCRs for data storage was a temporary measure. Your home VCR couldn’t compete with a purpose-built commercial device. It was all just a brilliant hack that let people in a dirt-poor country get massive storage for pennies.
Even in the peak years of 1994-1997 ArVid couldn’t be more than a niche product: the average consumer couldn’t even get their hands on 2GB worth of digital “stuff”. Why would you need a 2GB backup solution when your entire hard drive is just 500 MB in size? The “sweet spot” for ArVid was a small business or an academic organization – entities that would drop ArVid and “graduate” to a more “professional” backup solution as soon as they could.
In the Sannata forums🇷🇺, user “ASL” says that ArVid was a product that was mostly used by the Fido7 crowd, a small group:
In those times, the Trio64 cost 40 bucks, while the first Pentium was 100. During our first year at the university, out of our class (120 people), only five students had a computer. Only those who really needed it would pay a hundred for an archiving board. And even then, you had to know about it (information about it mostly circulated among Fido network users). And that was not a lot of people.
Another factor slowing its spread: this was not a user-friendly device. It required skill to set up, to “train” for working with your VCR, and to troubleshoot the variety of issues that cropped up along the way…
As for the makers of ArVid, the PO KSI company:
PO KSI is still around and they have a website. They claim that 200,000 ArVid boards were manufactured🇷🇺 but that assertion is hotly contested🇷🇺 based on the analysis of serial numbers on the devices. PO KSI always had multiple product lines to rely on, like digital document scanning equipment and satellite photography devices.
This story doesn’t have a happy ending.
Russia has a sickly economy, and it does not have Rule of Law. Entrepreneurs have to find stability and protection from violence – and the best way to do so is to get in bed with the government (the oh-so-sexy government). If you dig deeper, you’ll discover that PO KSI has gone on to supply equipment for the Russian Census and for the military🇷🇺. In December 2016, the US White House sanctioned the company for providing specialized training to Russia’s GRU spy agency.
Post-Soviet Russia in the 1990s was a wild and violent place. For budding computer enthusiasts, this was an exciting time. A time when it was finally possible to get your hands on western technology. A time to take your rightful place on the global Internet. The lack of money meant that you had to get inventive – the ArVid backup system was a shining example of this inventiveness, care and skill that could thrive in a chaotic environment.
But no amount of technical ability can change the reality of politics, power and even the national character of Russia. As I write this in 2023, Russian technologists can’t escape the same bleak choices facing ordinary Russians: escape, hide, persevere… or collaborate and prosper.
Send me your thoughts, comments and unintelligible yelps at the email address “jacob at this website”!
Delicious leftovers 🍖
Was ArVid the first of its kind?
No. There were several Western products that tried to accomplish the same thing. Storing data on magnetic tape was not a new thing: tape was popular in the days of mainframes, and is still used today. It is a cheap and reliable storage medium.
Storing data on domestic VHS tapes was the innovation here. It was also a logical next step from commercial tape technology, but only a few companies tried it and it ended up as a niche curiosity.
There is a long history of storing data on media meant for domestic music playback. The Commodore Datasette devices and the cassette drives for the Atari 400/800 computers used audio cassettes for data storage:
For those who are curious to learn more about digital data storage on analog cassettes, this Wikipedia page is a good starting point. The main principle is that data ones-and-zeroes can be turned into audio or video signals and stored just like a song or a movie.
An extreme example of using a domestic medium for data is the “Floppy ROM” – a flexible turntable record that arrived as a magazine insert. You could put it on your record player, and “play” the programs on it into your computer. (Here it is on video – you can see how thin and soft it is)
Moving from audio media to VHS tape, the Corvus “Mirror” device was one that could store 91 megabytes of data on a 3-hour tape. In 1980 Corvus filed patent US4380047A for the device. From the Corvus Mirror manual, it appears that the product was in-market in 1984.
Youtuber Technology Connections has a great video about the early days of storing high-fidelity digital audio on VHS tape. At time 13:57, you can see how effectively proper error-correction algorithms compensated for errors on tape. The audio signal sounds great despite Alec’s intentional interference with it. This is why the ArVid’s software had so many error control measures.
The Danmere Backer was often compared to the ArVid. It could store 1.5 GB on a 3-hour VHS tape in normal mode and 3GB in long-play. Apparently, it showed a “file identifier” on screen to help you manually forward the tape to the precise spot where your file was stored.
More about the Danmere Backer system in this video by Lazy Game Reviews.
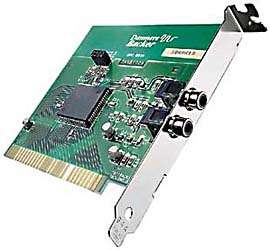
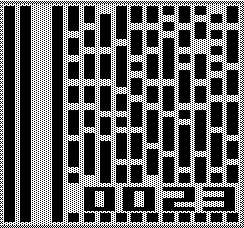
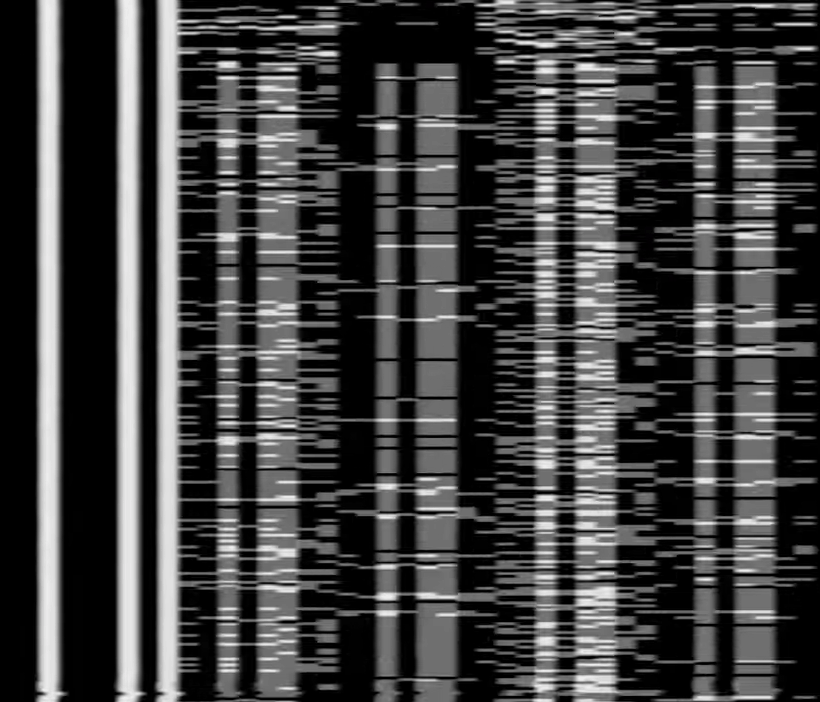
Another competitor in the PC market was the Alpha Micro Videotrax (from Foone on Twitter):
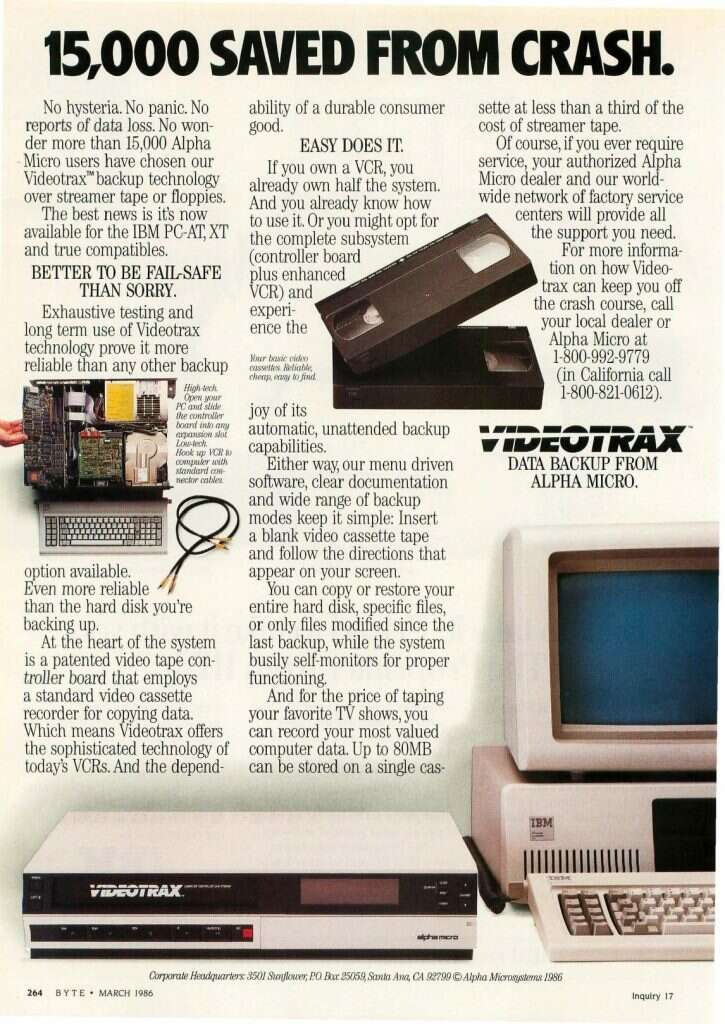
Before they made the Videotrax add-on for PCs, the makers built the Alpha Micro 1000 computer which had a built-in ability to back up data to VHS tape. Here is an informative writeup about VHS data storage from the makers of the AM-1000 and Videotrax (Thanks to commenter Cameron for mentioning the AM-1000!).
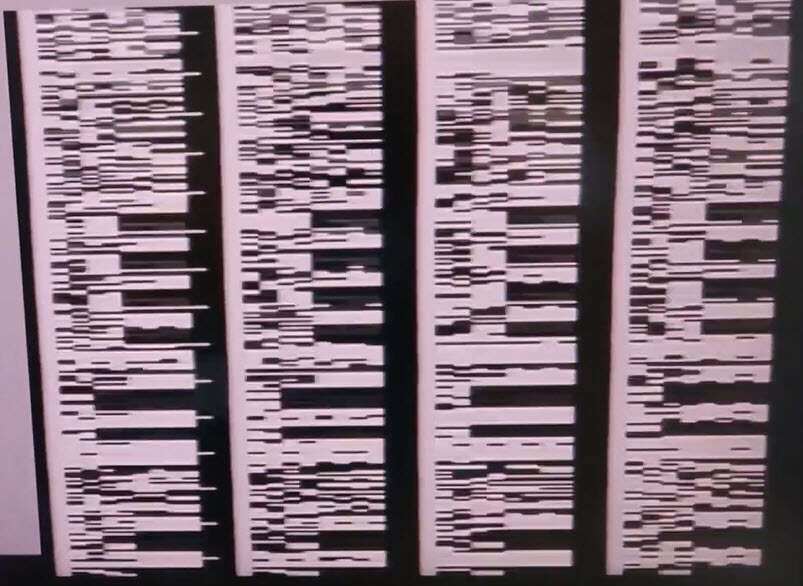
Honourable mentions go to the Commodore Whizzard, Commodore Video Fast Loader, the Amiga VBS (Video Backup System), Magurex VBS, Lyppens VBS (see this webpage on Lyppens) and the Rossmöller Handshake Video Backup System.
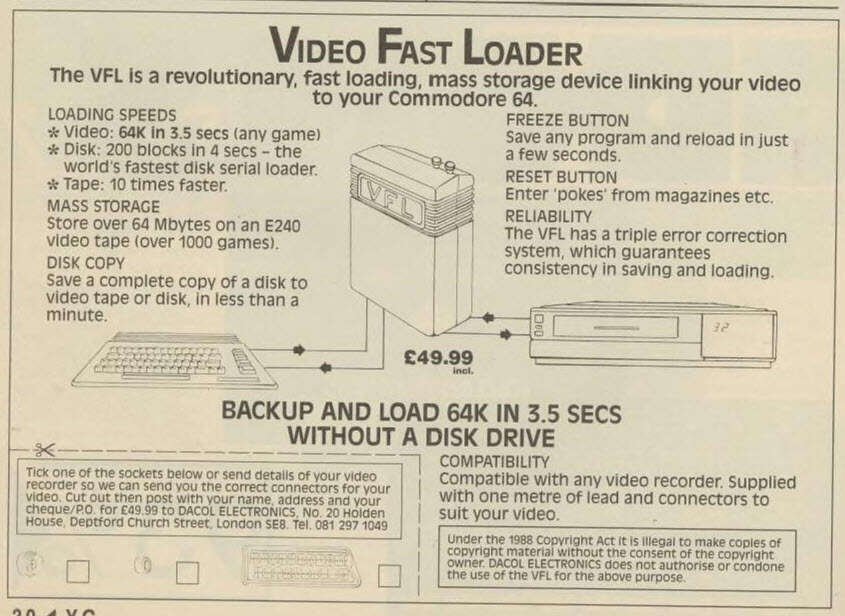
Counterfeits
A passive-aggressive rant in the ArVid FAQ documents mentioned that PO KSI had to deal with “fake” ArVid cards. It appears that older cards – the ones that weren’t based on an FPGA microchip – could be hand-soldered from standard components.
Forum user “Vintik_33” on the Sannata forums claims that they participated in a ring that made fake etched plates and soldered ArVid clones from components🇷🇺.
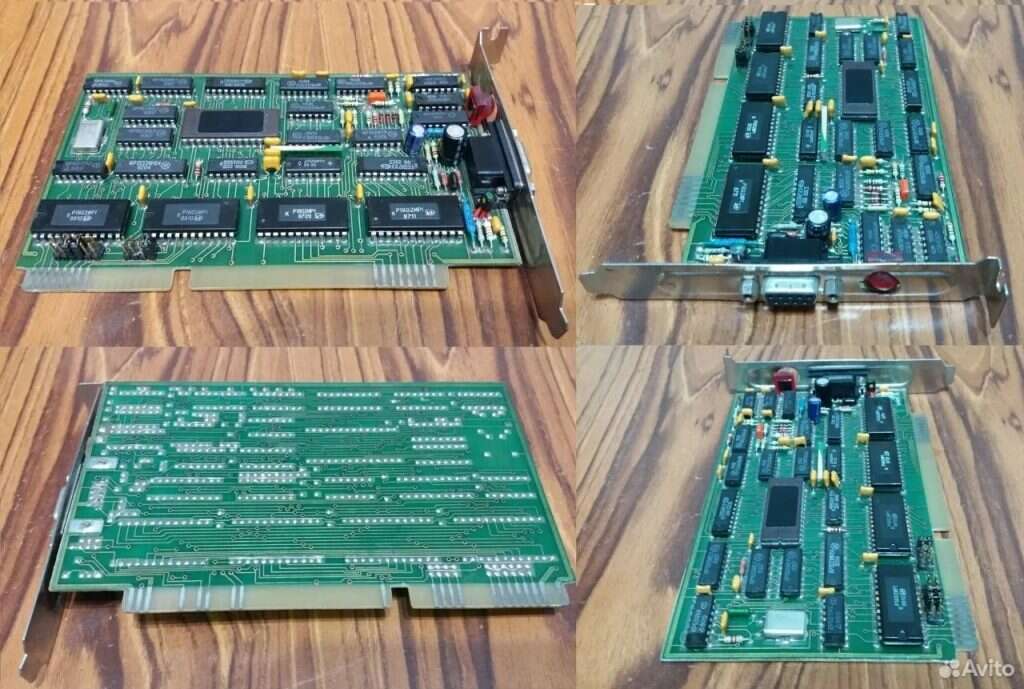
Where would people buy this device in the 90s?
I spent a long time figuring out how PO KSI advertised these devices to the public. There were no magazine ads. Only a few spammy posts on Fido7… There were about 5 authorized dealers of the product listed in the FAQs – with most of them appearing to be individuals, rather than businesses. One endearing thing I found was a BBS file with prices and directions to the home of Mikel Lavrentyev, the primary dealer:
In one forum discussion, a user backed their opinion that ArVid had limited sales by stating “I visited Mikel’s place to pick up my device – and it didn’t look like the home of a high-earning businessman”.
I believe that knowledge of this product spread by word of mouth. Especially among BBS operators. Mikel, in particular, seemed to be a key member of the Fido7 network of technologists and would have been part of the social scene in the 90s. This method of marketing would’ve been great for staying under the radar of local criminals, but terrible for attracting the public’s business…
[Update on 2024-02-07: user “faust93” on HackerNews kindly shared information about how people found this product: “…Regarding the purchase. At the time I lived in a large industrial city 1000km south of Moscow and there we had several resellers in town (small computer hardware retail firms mostly) not sure if it was official or not. Another purchase option was the so called ‘radio market’ a weekend event where people met to exchange,sell or buy computer software and hardware parts. So yep, there were no official ads or whatever and mostly it was a ‘word of mouth’ among techies as you mentioned it.”]
How much will an ArVid cost me today?
Nowadays (the year 2023 – when men were horses, and horses knew the value of a nickel), a 1052 card sells for $10USD on Meshok.net. I also saw an old computer with an ArVid installed on sale for 18,500 Roubles – about $205 USD – on Avito.ru. You can search Avito, Meshok and Youla.ru for the Russian word “Арвид” to find it.
Russia is under financial sanctions, so you may have trouble paying for the device and getting it shipped. You might have better luck looking for one on Ukrainian sites. Back in the 90s there was an official dealer in Kiev so there would be a few floating around. Stunningly, even though Ukraine is a warzone I’ve been able to get eBay-bought items from Ukrainian dealers. With real-time shipment tracking and all!
Wow, you’re still here?
There’s more Behind the Scenes content about how this article was made. Go ahead, stay in the rabbit hole 🐰
Appendix: list of device models
The technical specifications are mainly from the 2001 version of Arvid.ru, with some notes from me.
| Arvid 600 Was the first model, possibly internal. Worked only with Toshiba VS-109CZ and used exclusively the VCR’s time position indexing. But with a move towards supporting a variety of VCRs, Arvid couldn’t rely on that being present or to work well. “[AD] The very first Arvids (Arvid-600 model) used only index search. However, they were initially designed only for VCR models Toshiba VS-109CZ, which happened to be in the KSI due to a certain batch. The index search there was quite reliable. The only limitation was that the recording length should not be less than a minute (everywhere – closer marks simply would not be recognized as separate). In general, everything worked quite well.” |
| Arvid 1000 Mentioned in a copyright notice from 1993-1995. No further details. |
| Arvid 1010 speed & tape format: 100kb/sec (tdr); hardware buffer: 4kb software support: DOS only system requirements: free ISA bus slot; one I/O ports (220h); one IRQ (10) power requirements: 8 VA |
| Arvid 1020 speed & tape format: 100kb/sec (tdr), 200kb/sec (tdr/avt) hardware buffer: none software support: DOS only system requirements: free ISA bus slot; one DMA channel (5, 6* ,7); one IRQ (10, 11*, 12, 15) power requirements: 8 VA |
| Arvid 1031 speed & tape format: 100kb/sec (tdr), 200kb/sec (tdr/avt) hardware buffer: 64kb software support: DOS, Windows 95, Windows NT system requirements: free ISA bus slot; one I/O port (310h, 330h, 350h*, …, 3F0h); one IRQ (10, 11*, 12, 15) power requirements: 0.5 VA |
| Arvid 1051 speed & tape format: 100kb/sec (tdr), 200kb/sec (tdr/avt), 325kb/sec (avt) hardware buffer: 128kb software support: DOS, Windows 95, Windows NT system requirements: free ISA bus slot; one I/O port (310h, 330h, 350h, …, 3F0h); one IRQ (10, 11, 12, 15) power requirements: 0.5 VA |
| Arvid 1052 speed & tape format: 100kb/sec (tdr), 200kb/sec (tdr/avt), 325kb/sec (avt) (The ArVid FAQ says that in terms of density, 325kb/sec is the maximum possible for household VCRs) hardware buffer: 512kb software support: DOS, Windows 95, Windows NT system requirements: free ISA bus slot; one I/O port (310h, 330h, 350h, …, 3F0h); one IRQ (10, 11, 12, 15) power requirements: 0.5 VA |
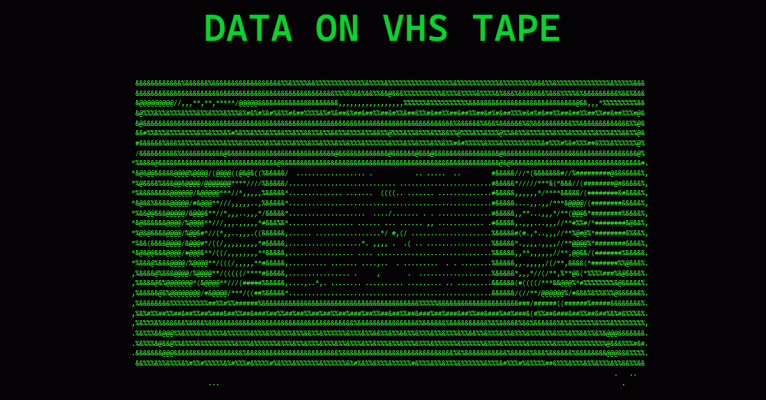

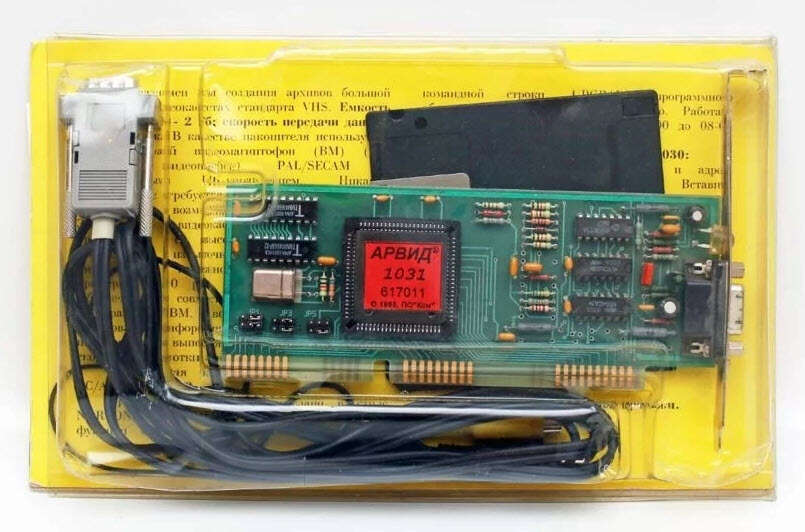
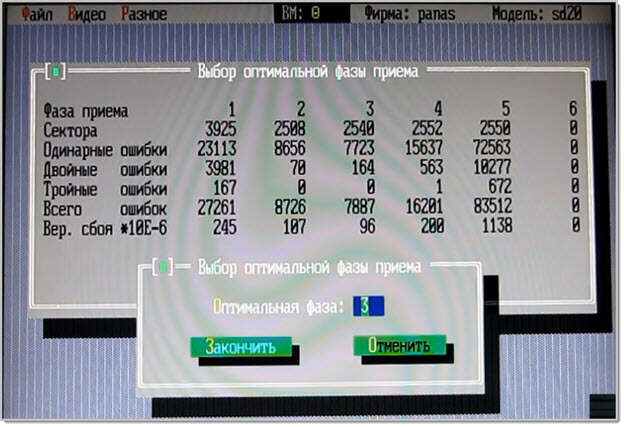
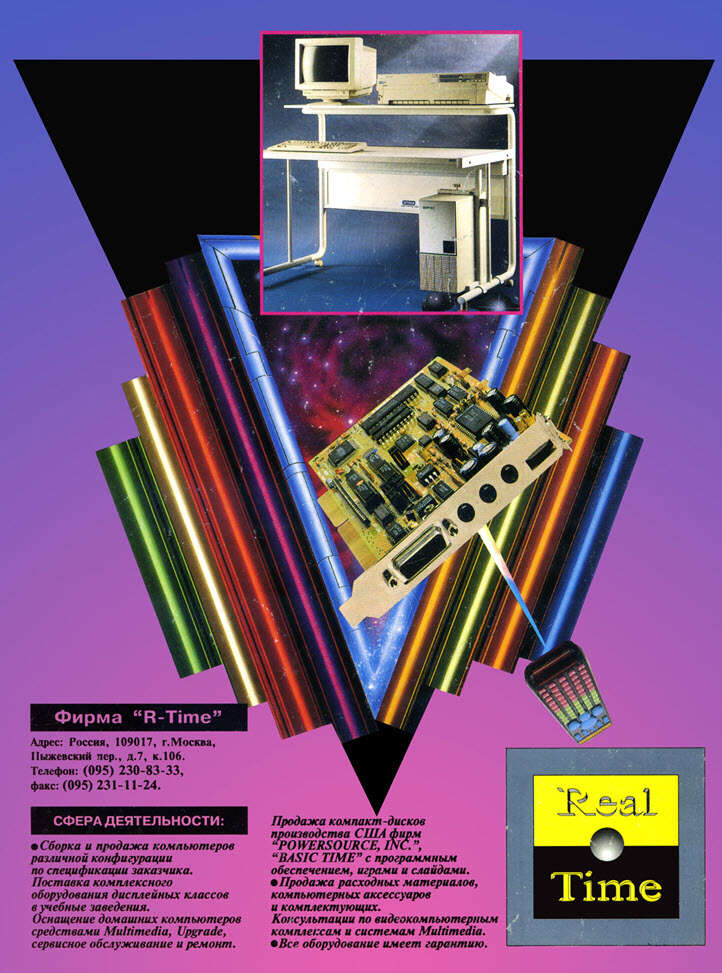

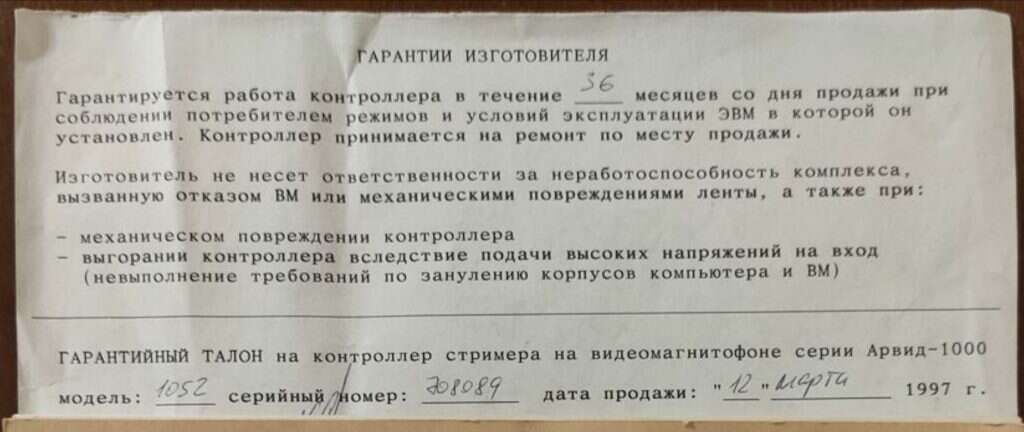
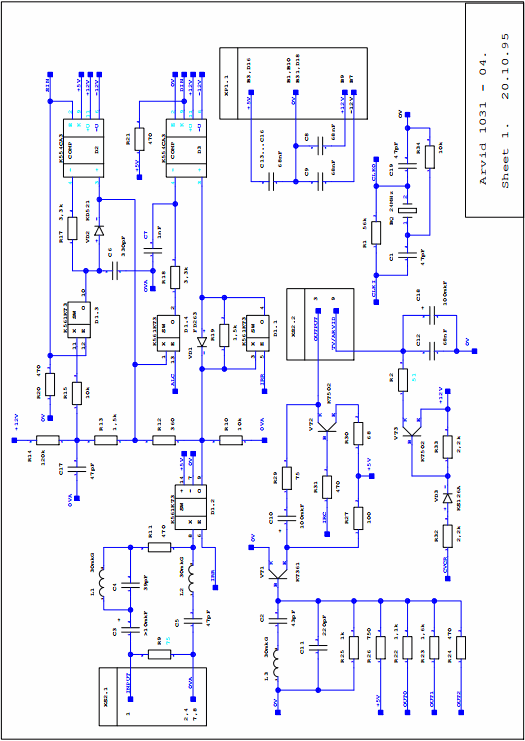
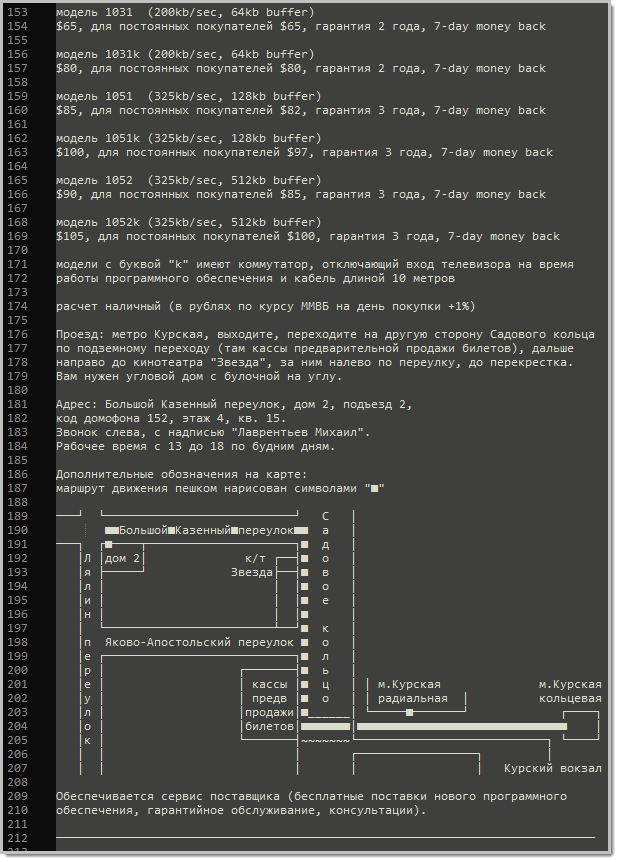
January 26, 2024 — 5:52 pm
Fascinating article but I’m curious — where are the schematic files in those archives — you mentioned they were in hpgl format but I don’t see any files that end with that in the file hierarchy list here? Thanks! I’m really wondering what sort of circuitry they used to make those.
January 26, 2024 — 9:16 pm
Actually, Alpha Micro predates this. While the Videotrax product was positioned at PCs, VHS was the primary backup method for Alpha Micro systems to at least the AM-1000 (1982) and perhaps earlier. http://debi.floodgap.com/www/1000.htm
January 26, 2024 — 9:18 pm
sorry, that URL should have been http://ampm.floodgap.com/www/1000.htm
January 26, 2024 — 10:58 pm
My bad – originally I wrote that the files have the .hpgl extension, but I’ve now edited the article to note that the right extension is .01P. So, for example, look for “K1052_2.01P” and get the zip file that contains it. You’ll probably need to rename the extension to .hpgl in order for viewers to open them.
And, in case closeup photos of the device help:
Here is the pre-FPGA model: https://upload.wikimedia.org/wikipedia/commons/thumb/b/b9/Arvid_1020.jpg/1200px-Arvid_1020.jpg
Here is the FPGA model: https://hw.fagear.ru/wp-content/uploads/20140513_645381.jpg
January 28, 2024 — 12:57 pm
Thanks for the detailed article! I have used the 1020 and then the 1031 model for few years. I used tapes to store software distributives (mostly pirated ones), jpg photo collection and backups. The information about Arvid and it’s features spread from peer to peer, my colleague told me that this thing exists. Lot’s about Arvid were available from FIDO, it was the same as the internet now – not only media and place to talk, but also source of files, better than BBC – you just sign up for groups – file echos, and receive that software / text / pictures, that other people submitted there. BTW, Arvid developers personally take part in the FIDO discussions, too. Copyright doesn’t exist in Russia at that time, so the 1020 model, made on discrete logic, was copied by some other commercials quite fast. That was on of the reasons to switch to FPGA version. Another interesting fact is that 1020 model used DMA to read / write data from PC memory, because CPU was not fast enough to provide it without buffering with the enough jitter even under the DOS, without multitasking. This discovered the bug in 16-bit DMA realisation in some of the cheaper motherboards, because nobody use 16-bit DMA actively before. So ARVID developers have to made a 16-bit DMA test utility, so you can check your motherboard compatibility before buying. After the release of 1030, quickly replaced with the 1031 model, card doesn’t need DMA, as it have a DRAM buffer onboard. This also allows usage under Windows, because buffering allows bigger delays then multitasking and programming without direct access to memory was much simplier. If you need any other details, which I remember, feel free to ask me. For example, I was able to read types after 5 years of storage then needed without any problems, but on the same VCR. Not a record, but good stability result. Arvid always have been a device for geeks. Some rumours say it was a side project of the commercial organisation, affiliated with the science institute (Научно-исследовательский институт, НИИ), which works for the army, that’s why sources of the code was never made available for public even then requested by users after the project have been abandoned. That was some of the examples, then developed for military was used for good, same, as with the internet. Unfortunately, now in Russia it is used for bad 🙁
Thanks for the article again, and best regards!